Simulating a challenging posture in a more accessible relationship to gravity lowers the stakes and gives us a chance to experience the essence of the pose in a form we can more readily digest. Rather than drowning in effort, we can perceive what’s actually happening. This gives us an invaluable understanding of what’s required to practice the pose when the stakes are raised. One-Legged Handstand Prep is an especially interesting preparatory pose for Handstand because it teaches a few key actions that, when embodied, help us connect to a deep inner support. Below are four different incarnations of One-Legged Handstand Prep that will help you clarify your efforts and strengthen your inversions practice.
13 Apr 2016
One-Legged Handstand Prep
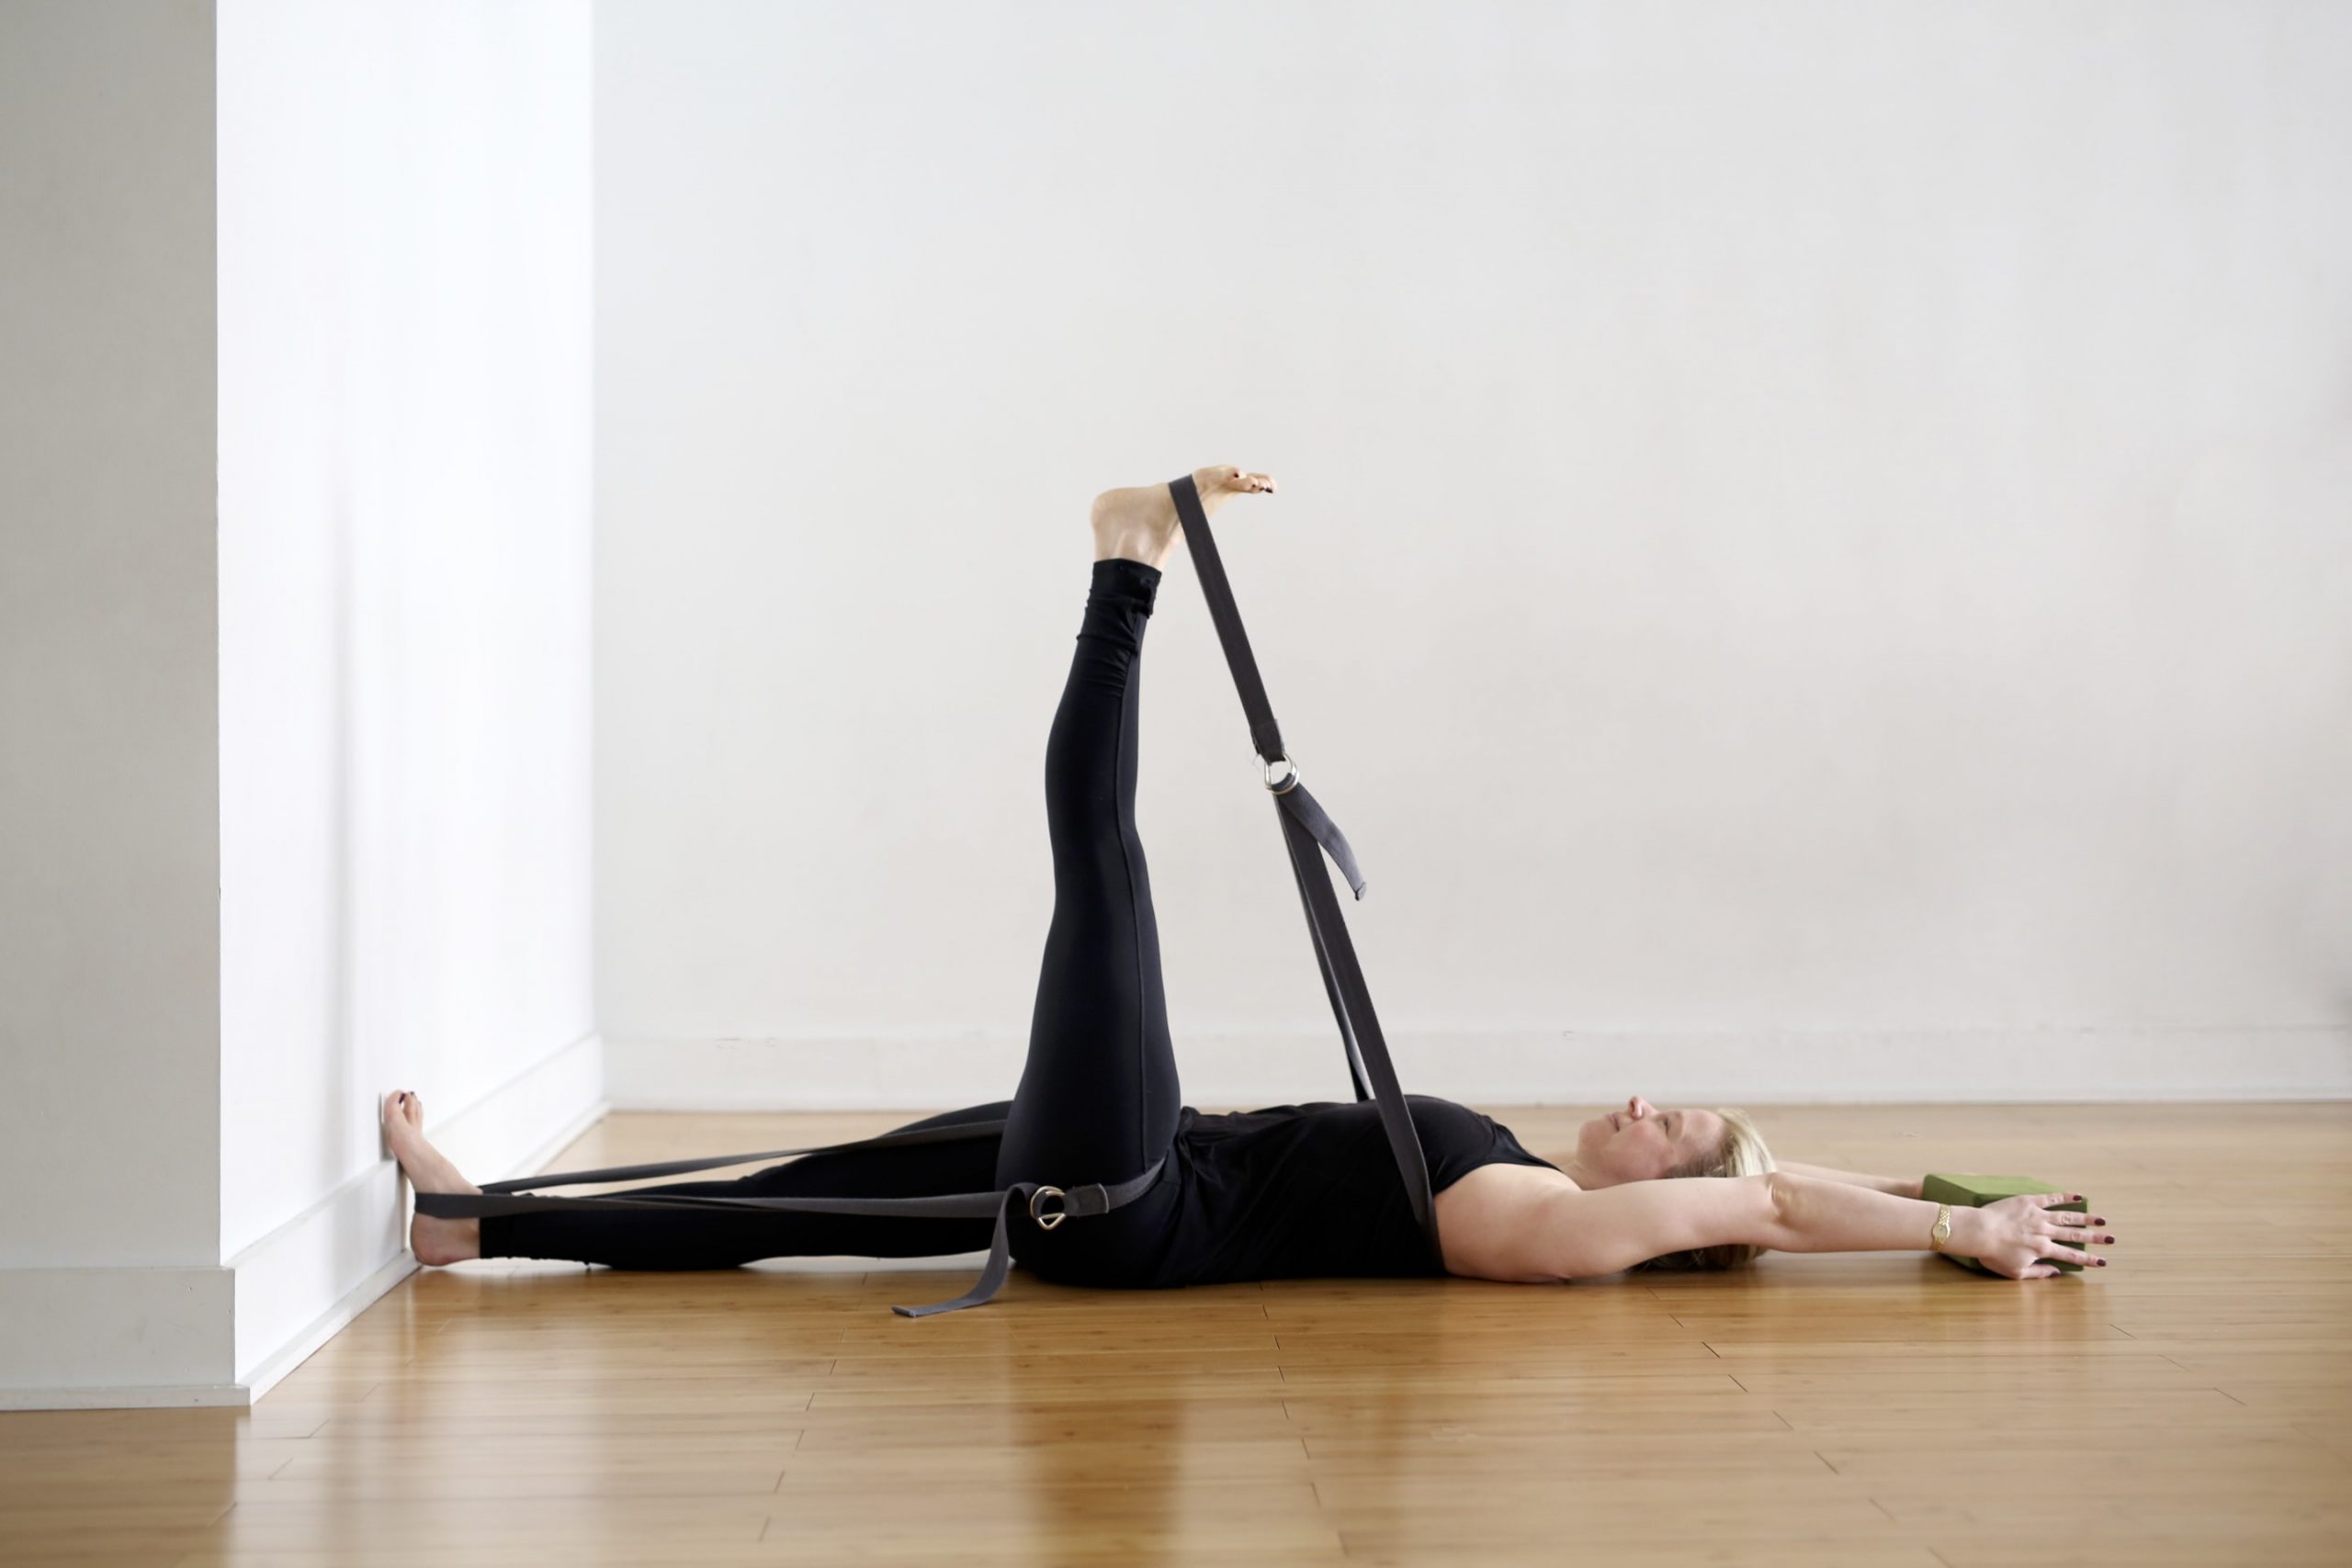
This variation of Supta Padangusthasana uses five props—a block, two straps, the wall, and the floor—to illustrate the key actions of One-Legged Handstand Prep. The bottom foot against the wall maintains the neutrality of the bottom thigh and offers something concrete into which you can drive your heel and lengthen the back of the leg. The traction belt around the hip provides a clear sense of direction for the outer thigh, dragging the greater trochanter towards the standing heel; this also lengthens the side waist. The belt around the top foot allows you to go “hands free,” and offers something into which you can press the big toe mound, which clarifies the work of the top leg. The block between the hands emphasizes the effort of the arms (elbow extension and external rotation of the upper arms at the shoulders), the grounding of the index finger knuckles into the block, and the length of the side waist. Finally, the floor encourages the width of the back body, especially the low back ribs. Stay in the pose for a few minutes in order to create a clear imprint of the actions in your body.
How To Use A Traction Belt: You’ll need a long strap to create a traction belt. Make a large loop in the belt approximately the length of your legs. Starting on the right side, orient the buckle of the strap so that it faces the wall to your right with the tail of the strap pointing forward towards your feet. Lie down on your back. Place the belt over both of your feet and hold the other end of the loop in your hands. Bend your right knee into your chest which will catch the traction belt in your right hip crease. Use your right hand to pull forward on the tail of your belt in order to tighten it around your right hip. The action of tightening the belt also drags the outer hip down towards the bottom heel, which lengthens the side waist and organizes the pelvis.
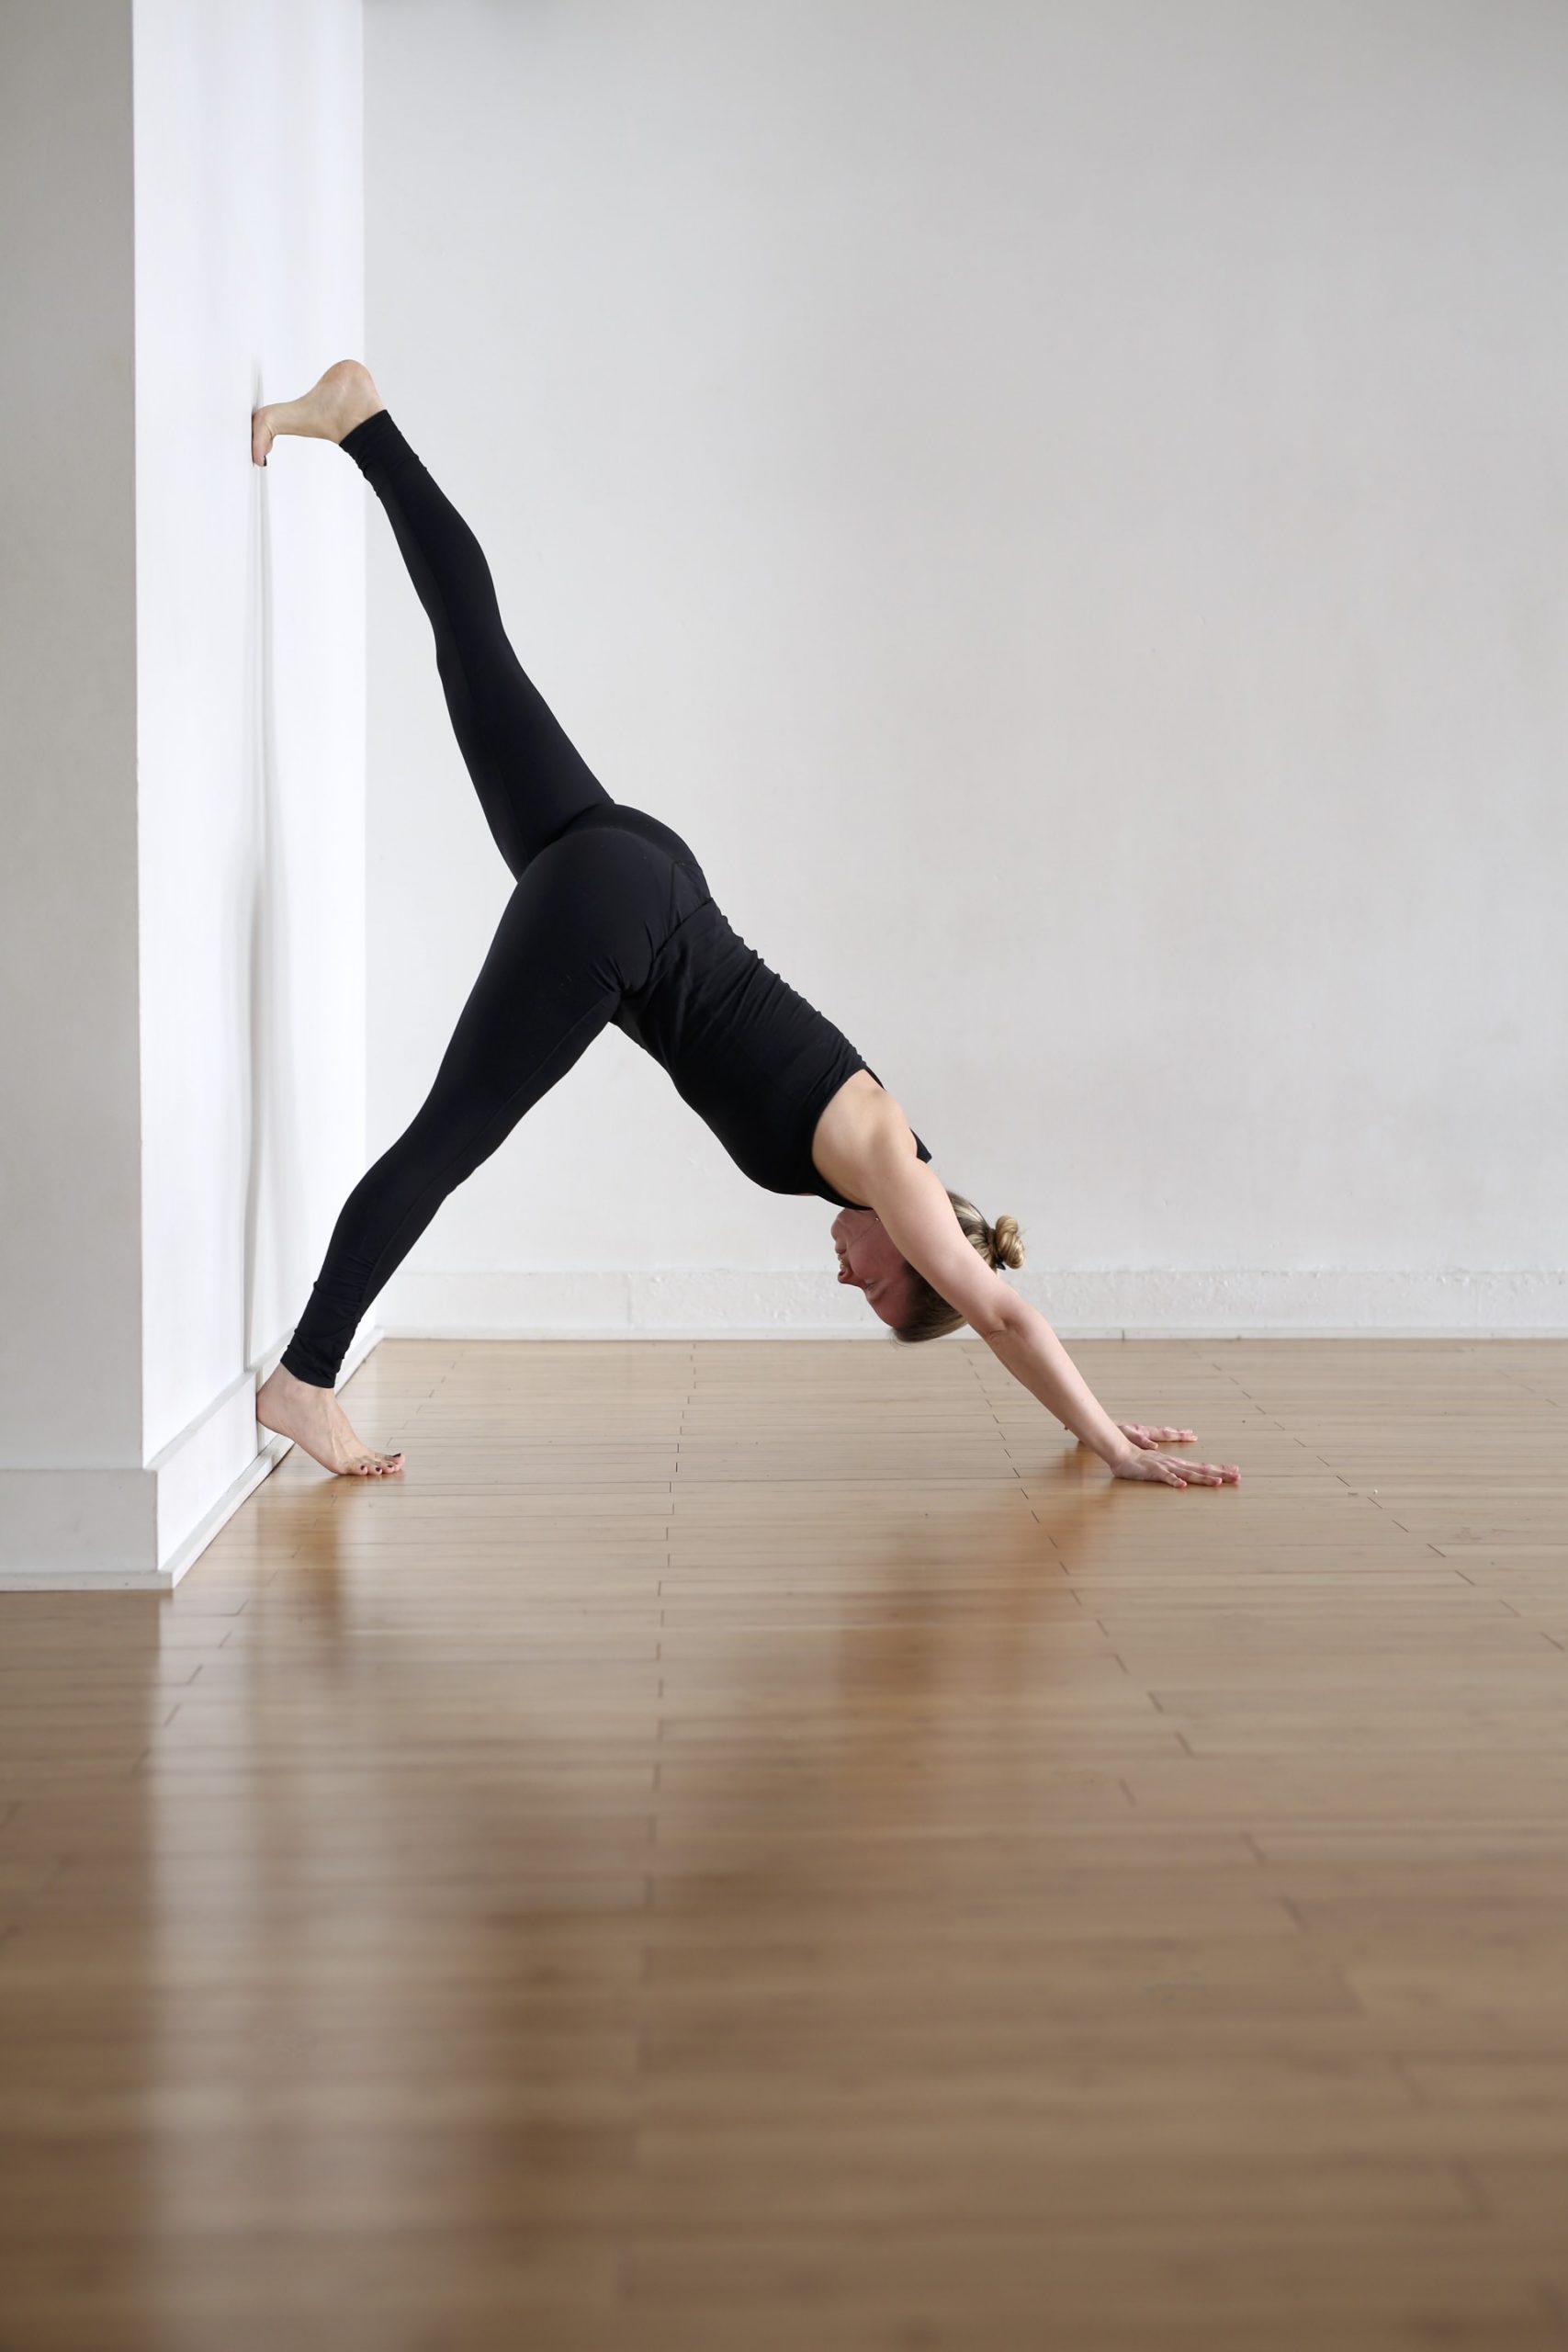
Standing Split at the wall takes the imprint of Supta Padangusthasana and puts it to work. Press down into the hands, especially into the index finger knuckles, just like you did when you held the block between your palms in Supta Padangusthasana. Pull up vigorously through the arms, which is obviously a lot more challenging in this relationship to gravity. One of the biggest compensatory patterns of One-Legged Handstand Prep is the destabilization of the shoulder blades on the back ribs, and the subsequent leaking of the upper arm bones into the armpits. You have to widen the shoulder blades and resist the head of the humerus bones away from the wall and into the scapulae (this also shifts your weight out of your wrists and into the knuckles of your palm). Knit the front ribs into the spine, which facilitates the same broadening of the back body that you felt against the floor in Supta Padangusthasana. Then you have to pull up with everything you’ve got; as one of my teachers would say, lift up through every cell of your body! Integrate the arms by wrapping the outer armpits towards the inner armpits. As for the legs, feel the memory of the traction belt around the standing hip which pulls it back and up towards the areal heel. Pierce the ceiling with the inner heel of the lifted foot. Drag your pelvis away from your shoulders to create length through the side waist. And, of course, breathe easy!
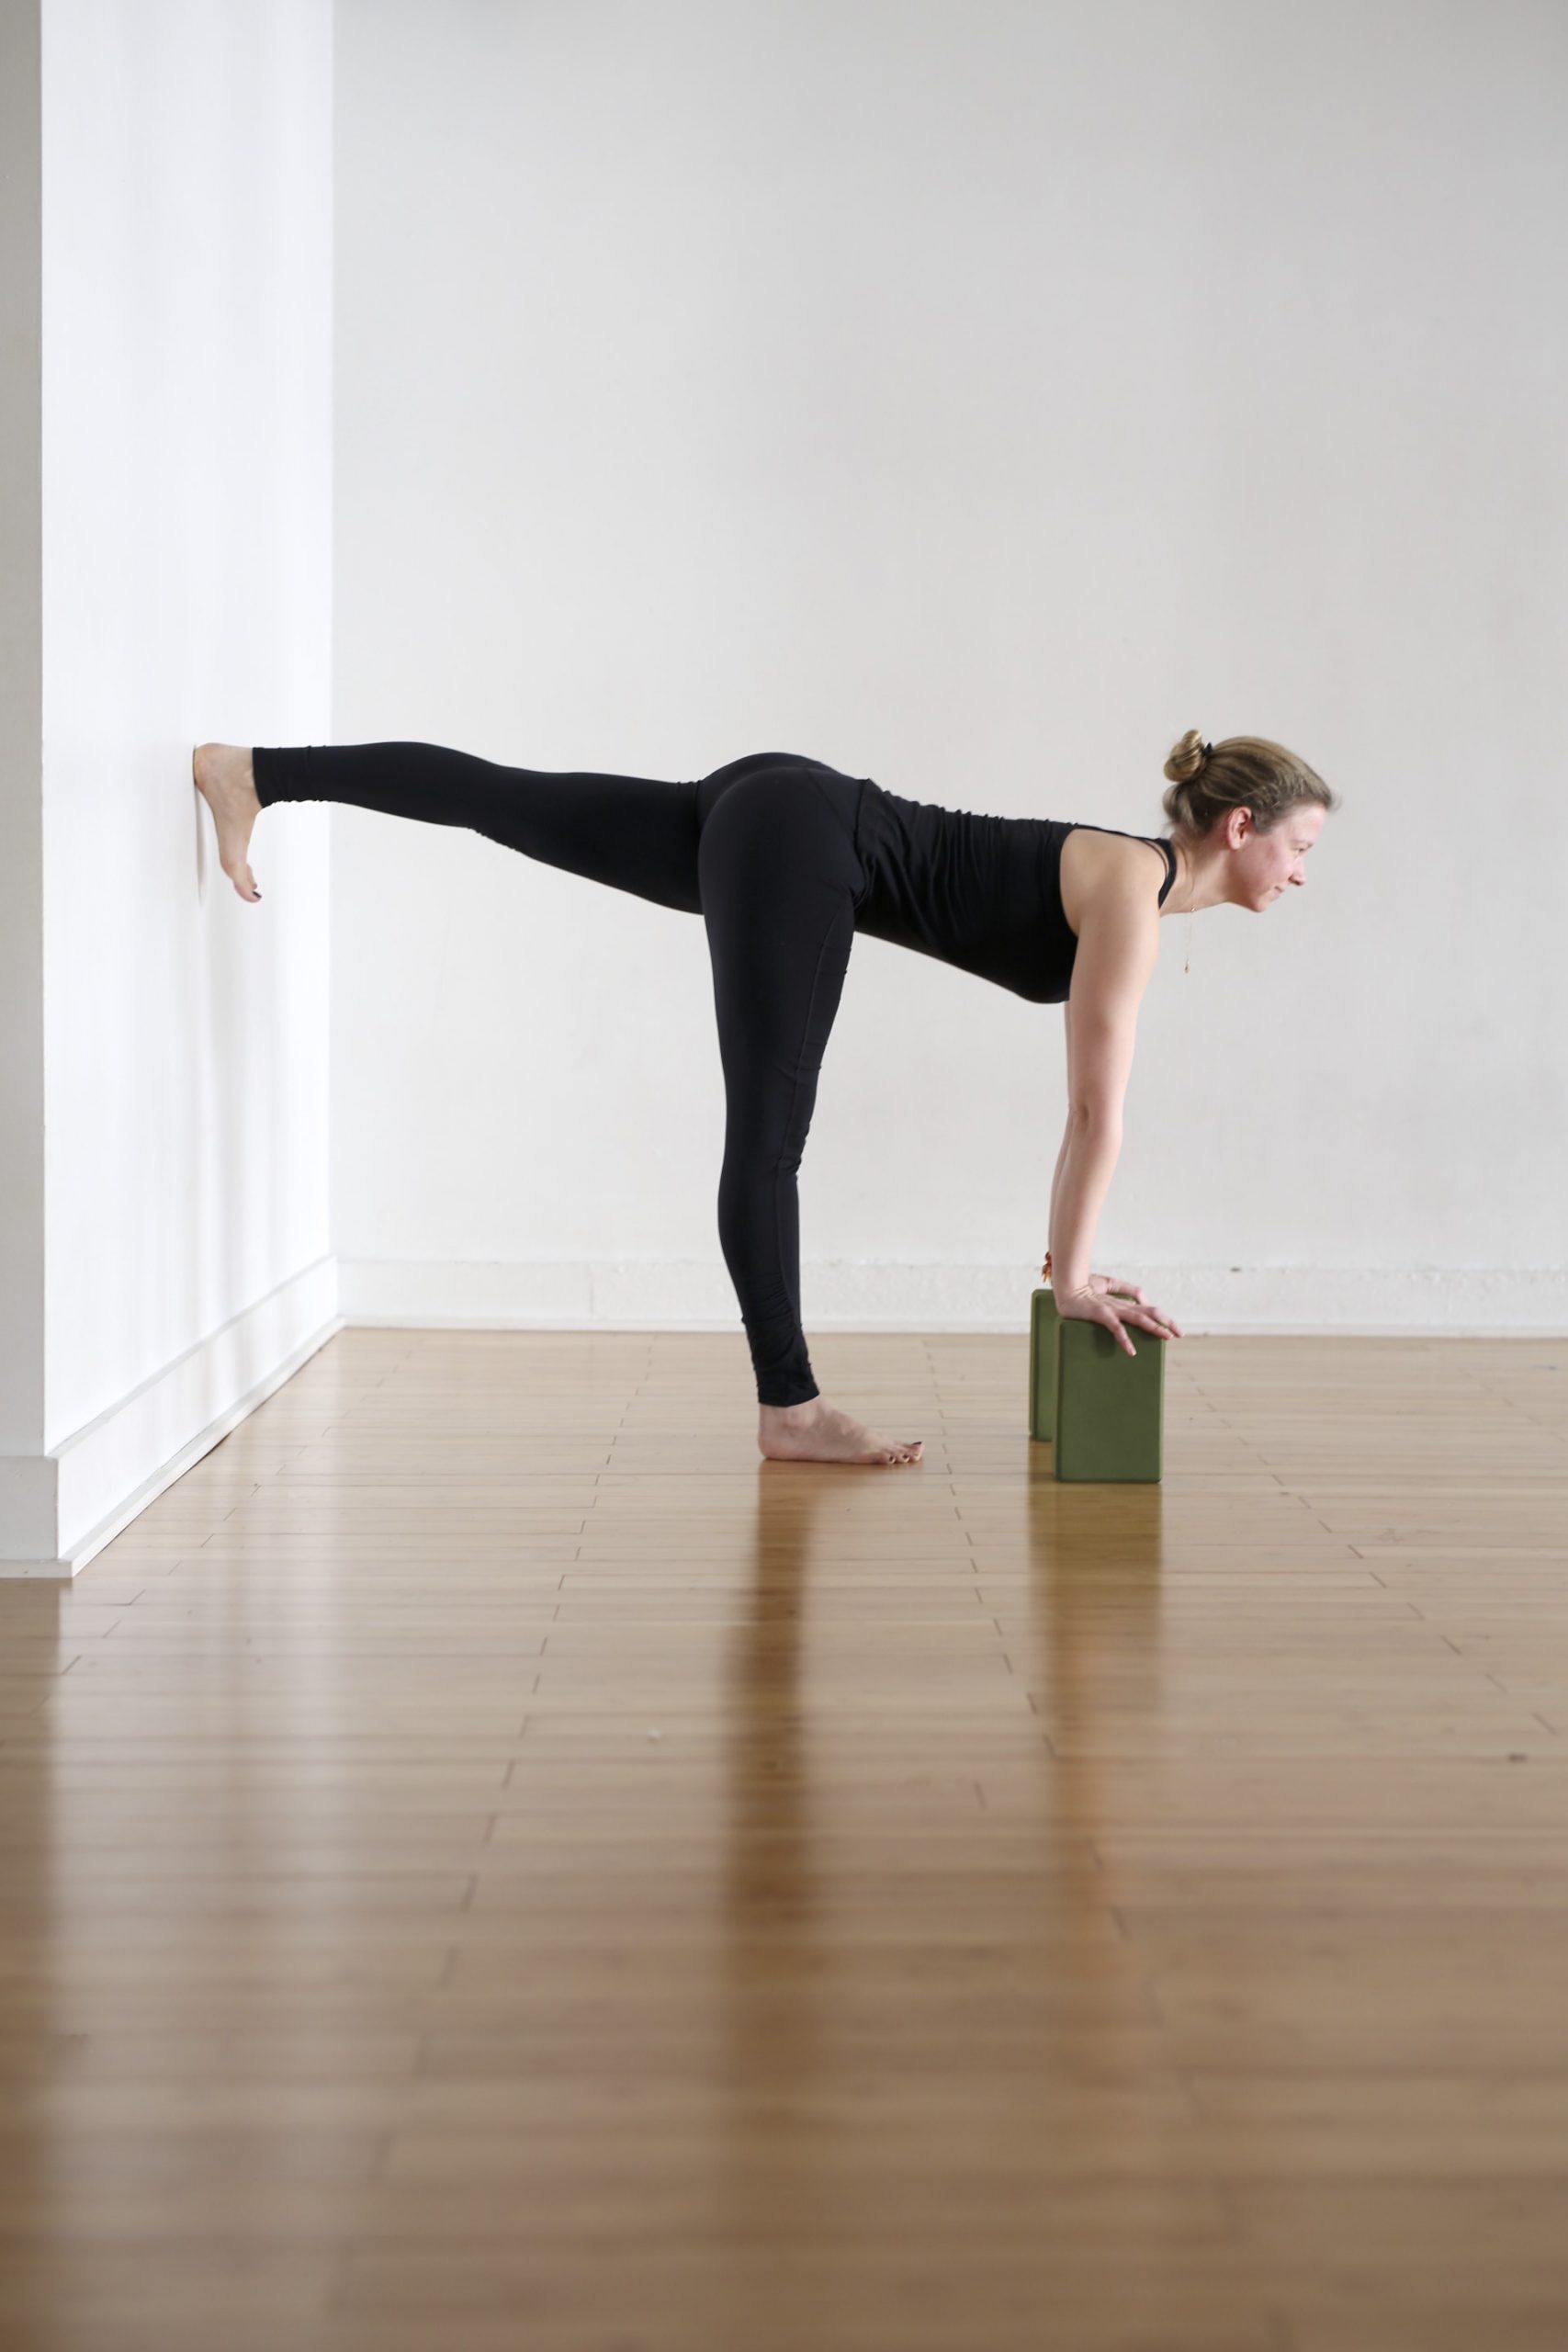
The next pose is everyone’s favorite: Warrior 3 at the wall! Just kidding! This pose is such a great example of how modifications can feel way harder than the original. The wall supports your balance giving you more bandwidth to perceive what’s actually happening, which incidentally is a LOT of work in the standing thigh and hip. This kind of support is a good thing because it’s so easy to collapse into that standing hip, which crushes your groins. No good. You have to lift up out of the hip joint and bob your pelvis like a buoy over the standing femur; it’s a full time job. The wall also keeps you honest, offering feedback on the alignment and energy of your back leg; keep in mind, the back leg of Virabhadrasana III is the lifted leg of One-Legged Handstand Prep. Spin the upper inner thigh towards the ceiling (as you firm your outer standing hip in!) and drive your heel into the wall. Notice how I’m pulling my back toes off the wall—this lengthens the back of my leg, sharpens my heel bone, and engages my quadriceps. Lengthen the torso, rebounding it away from the top heel. Relax your face and breathe.
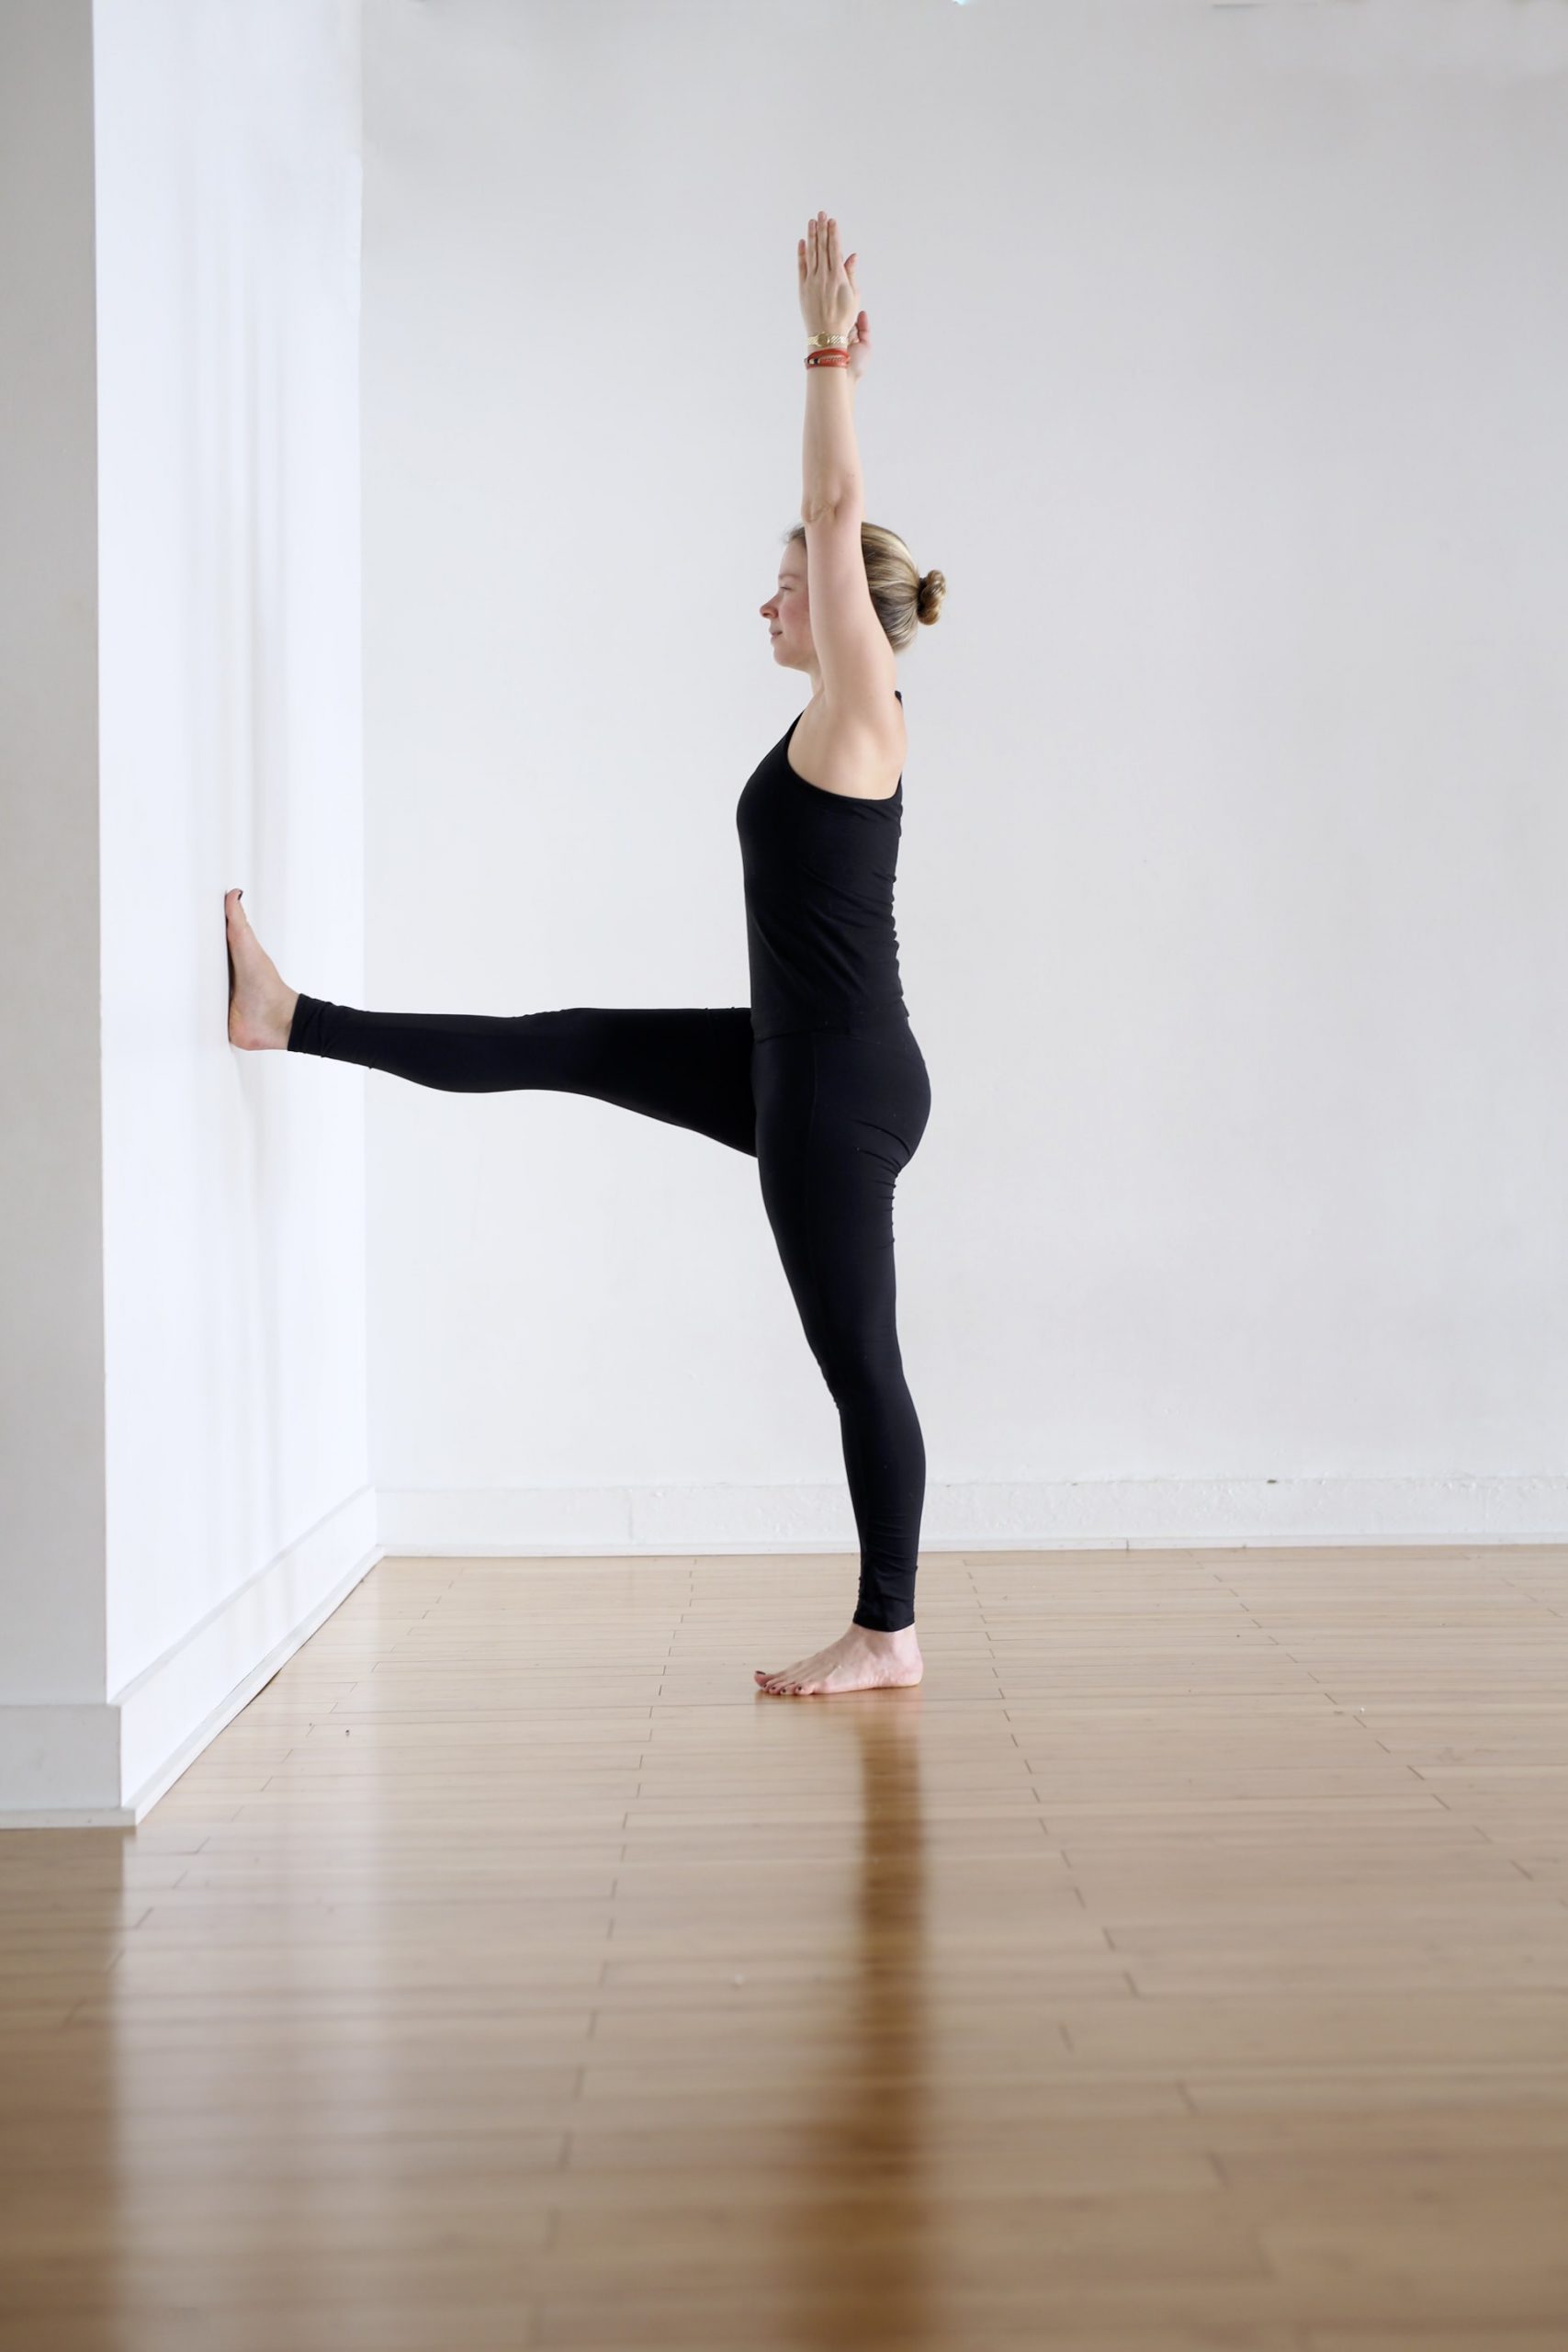
If you can visualize One-Legged Handstand Prep within the context of this next pose, Utthita Hasta Padangusthasana, it will give your effort a clear sense of purpose. Notice the line of the back body—it needs to be both wide and long. The width is harder to find. For most of us, the tendency in both Utthita Hasta Padangusthasana and One-Legged Handstand Prep is to leak into the front body—the top of the standing thigh wants to rest in the groins, and then as a result we’ll lean back and collapse into the kidneys. We have to move the front of our body into the back of our body in order to find integration and deep inner support (remember the feeling of spreading your back ribs across the floor in Supta Padangusthasana). Press the top of the standing femur back and up. Root the top of the upper arms back into the shoulder blades like you did in Standing Split at the wall. Absorb the front low ribs into the spine; spread your back ribs wide. To create the length, ground your standing heel into the floor and rebound up through your side ribs. Reach your arms up to the ceiling, creating even more length in the spine. Connect to the memory of the traction belt and the block from Supta Padangusthasana. Relax your jaw. Float your skull. Breathe.

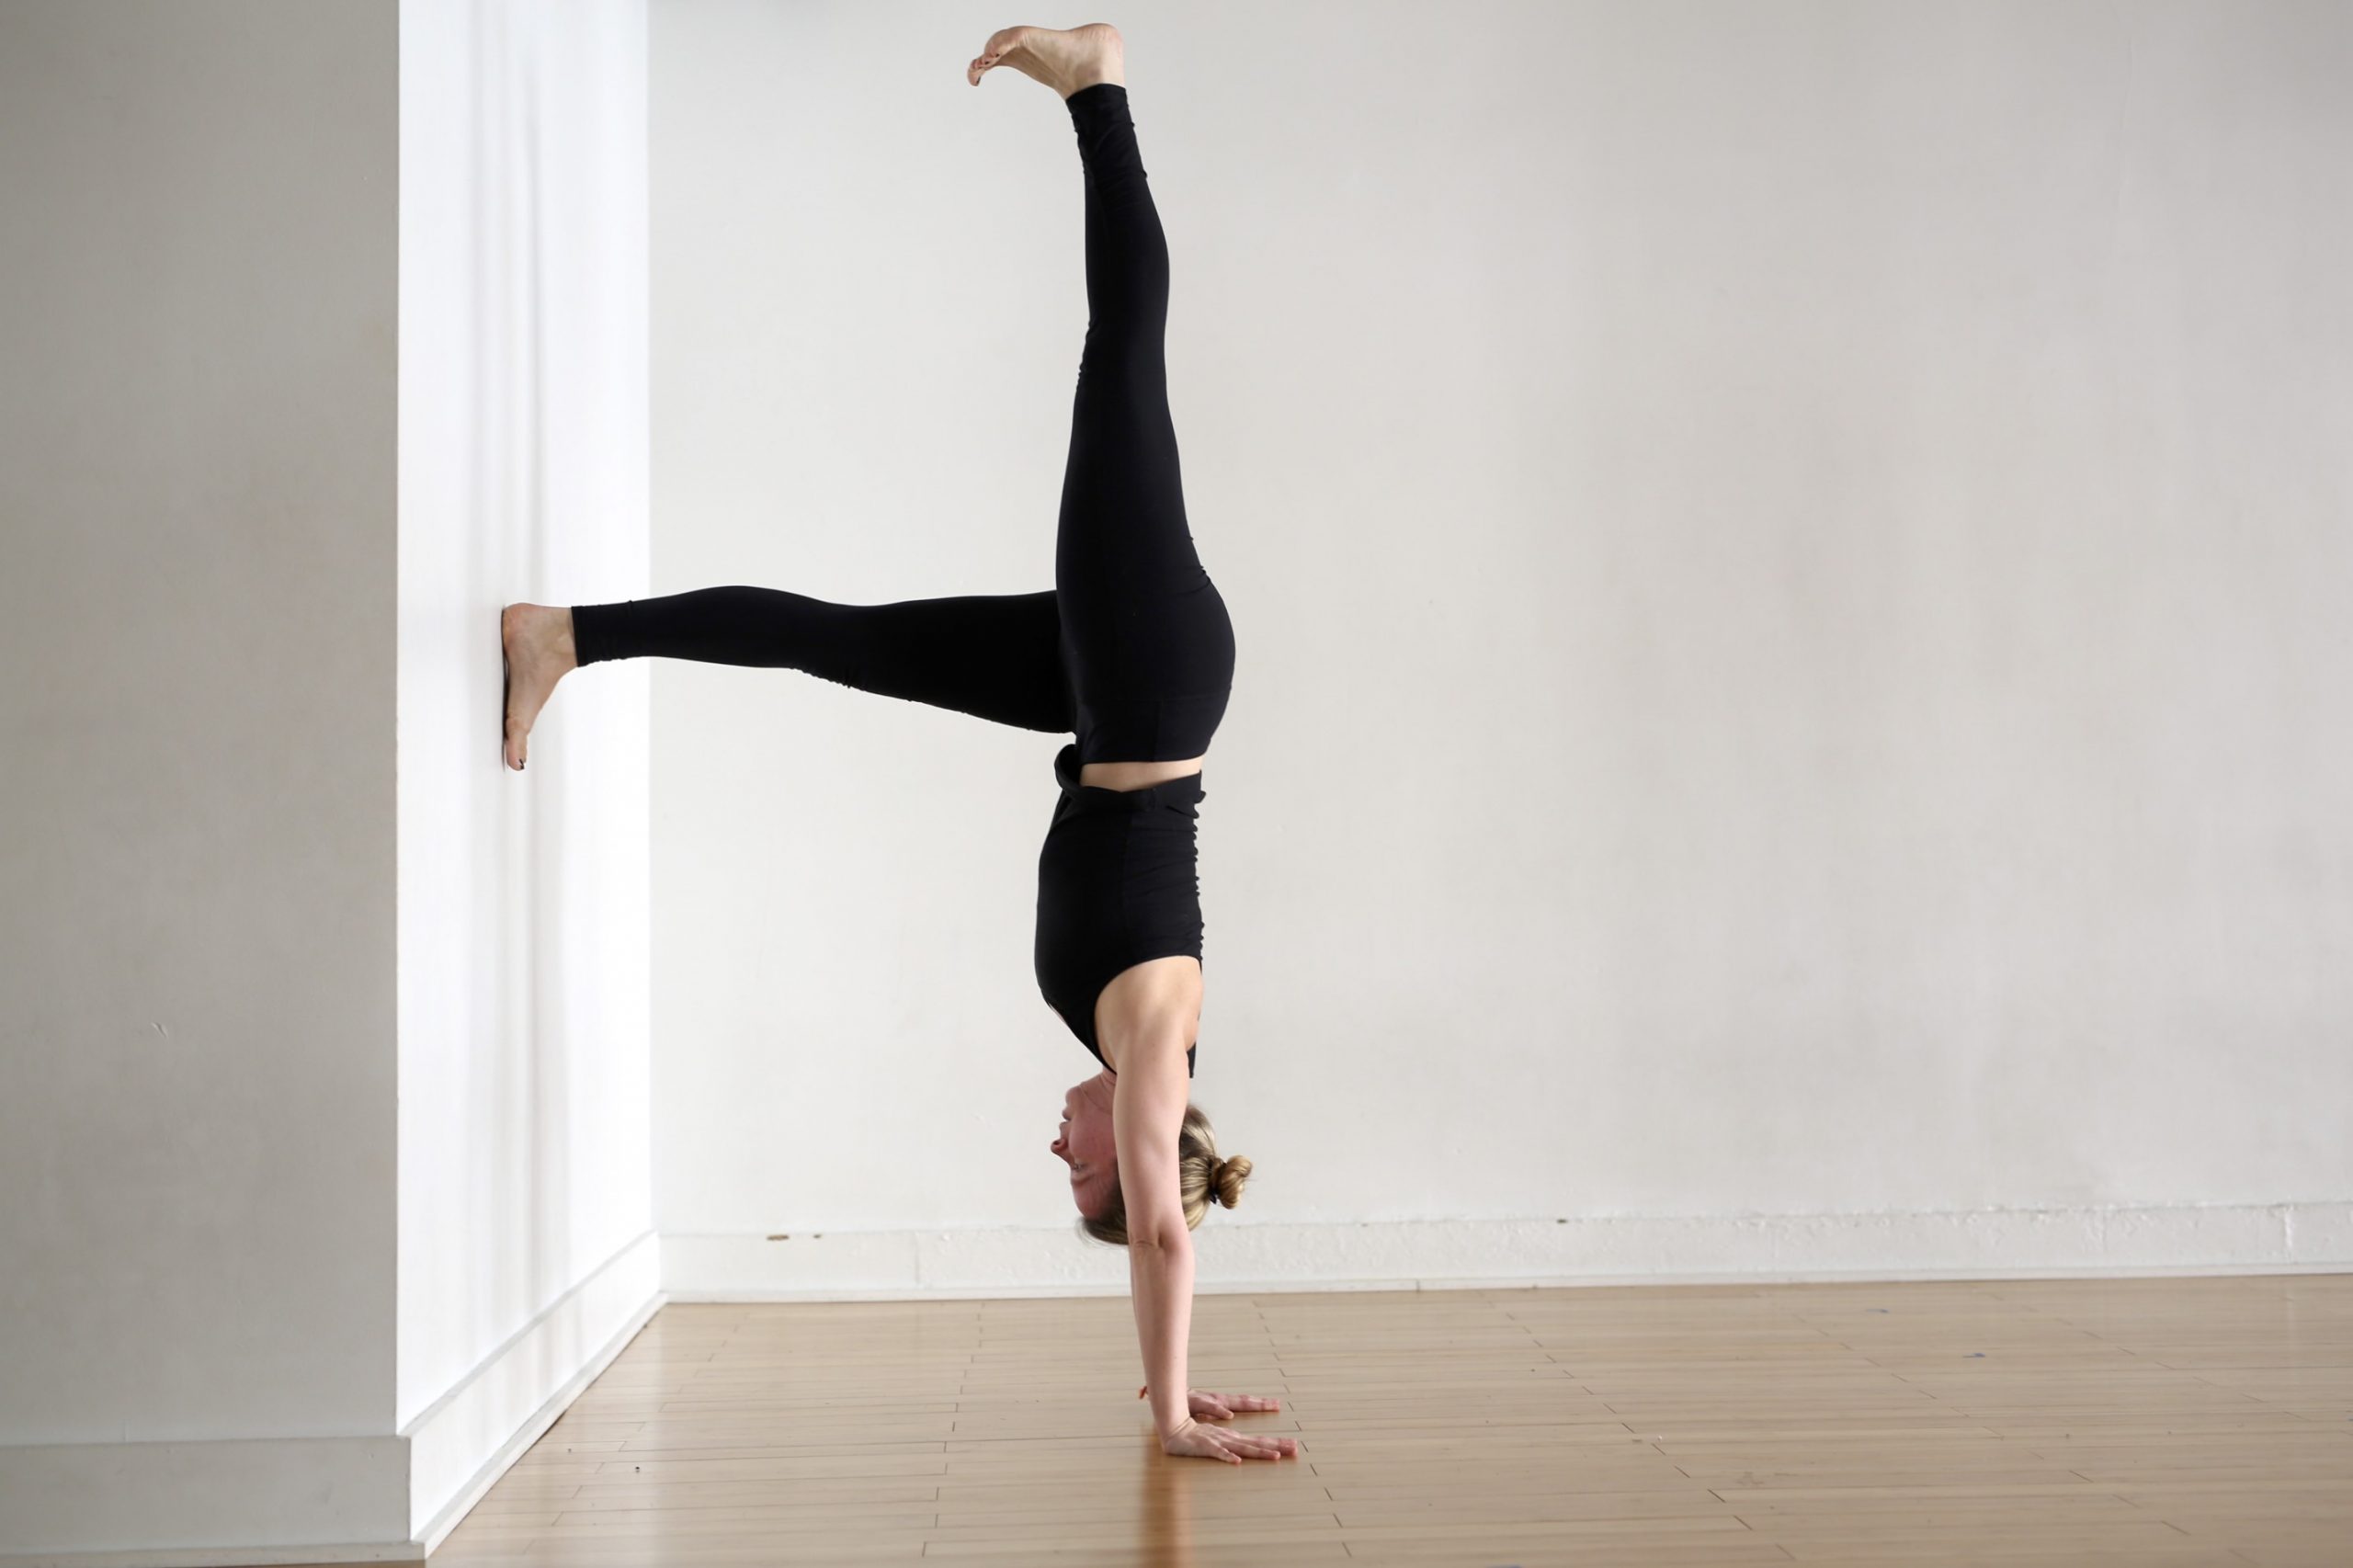
The work from the preparatory postures outlined in this post will not only help you access One-Legged Handstand Prep, but also Handstand (Adho Mukha Vrksasana)! The hardest part of Handstand is not necessarily Handstand, itself, but the journey into the pose. Once you’re in Handstand, it’s relatively easy to stay up there against the wall for a few breaths because all of your body parts are stacked one on top of the other; you’re in what’s called gravity neutral. Getting into the pose, however, is no joke; it requires all of the actions from the preparatory poses applied simultaneously as you sail through space against the force of gravity.
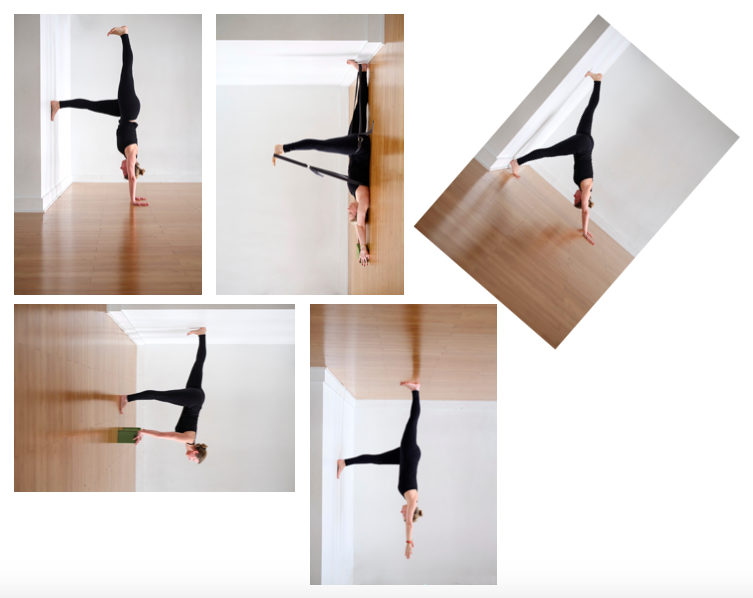
Here are some tips to help you get up into Handstand!
1. Look Forward. Keep your eyes on the road ahead. Your feet will follow your gaze. Look forward towards the wall until your feet hit the wall, and then take your gaze between your fingertips or allow your head to hang and gaze into the center of the room.
2. Straighten Your Arms. It’s always amazing to me how much concentration and effort it takes to actually keep my arms straight. Ground down into your index finger knuckles and pull up through your inner arms right up into the inner armpits. Firm your outer upper arms in. You can use a belt around your upper arms to help you draw in and up: Make a loop with the belt shoulder-width apart and position the belt on the distal end of the upper arm bones (the lower part of the arm closest to your elbows). Imagine making the strap slack, which will draw the upper arms in towards the midline and keep your elbows straight. Note: If you hyperextend your elbows, you can move your arms out into the belt and allow the belt to hold you in; this will prevent you from overdoing extension.
3. Broaden Your Back Body. Draw the front low ribs up into the spine and spread the back ribs wide across your upper back. Match this effort with the broadening of your collarbones across your chest.
4. Think ‘Butt To The Wall’. Focus on getting your pelvis to the wall rather than your top foot. Once the pelvis stacks over your shoulders, your bottom leg will float up on its own.
5. Spin The Top Thigh In. Rotating the kicking thigh internally and drawing the outer hip of the standing thigh towards the areal heel (think of the traction belt from Supta Padangusthasana) organizes the pelvis and integrates the thighs into the trunk.
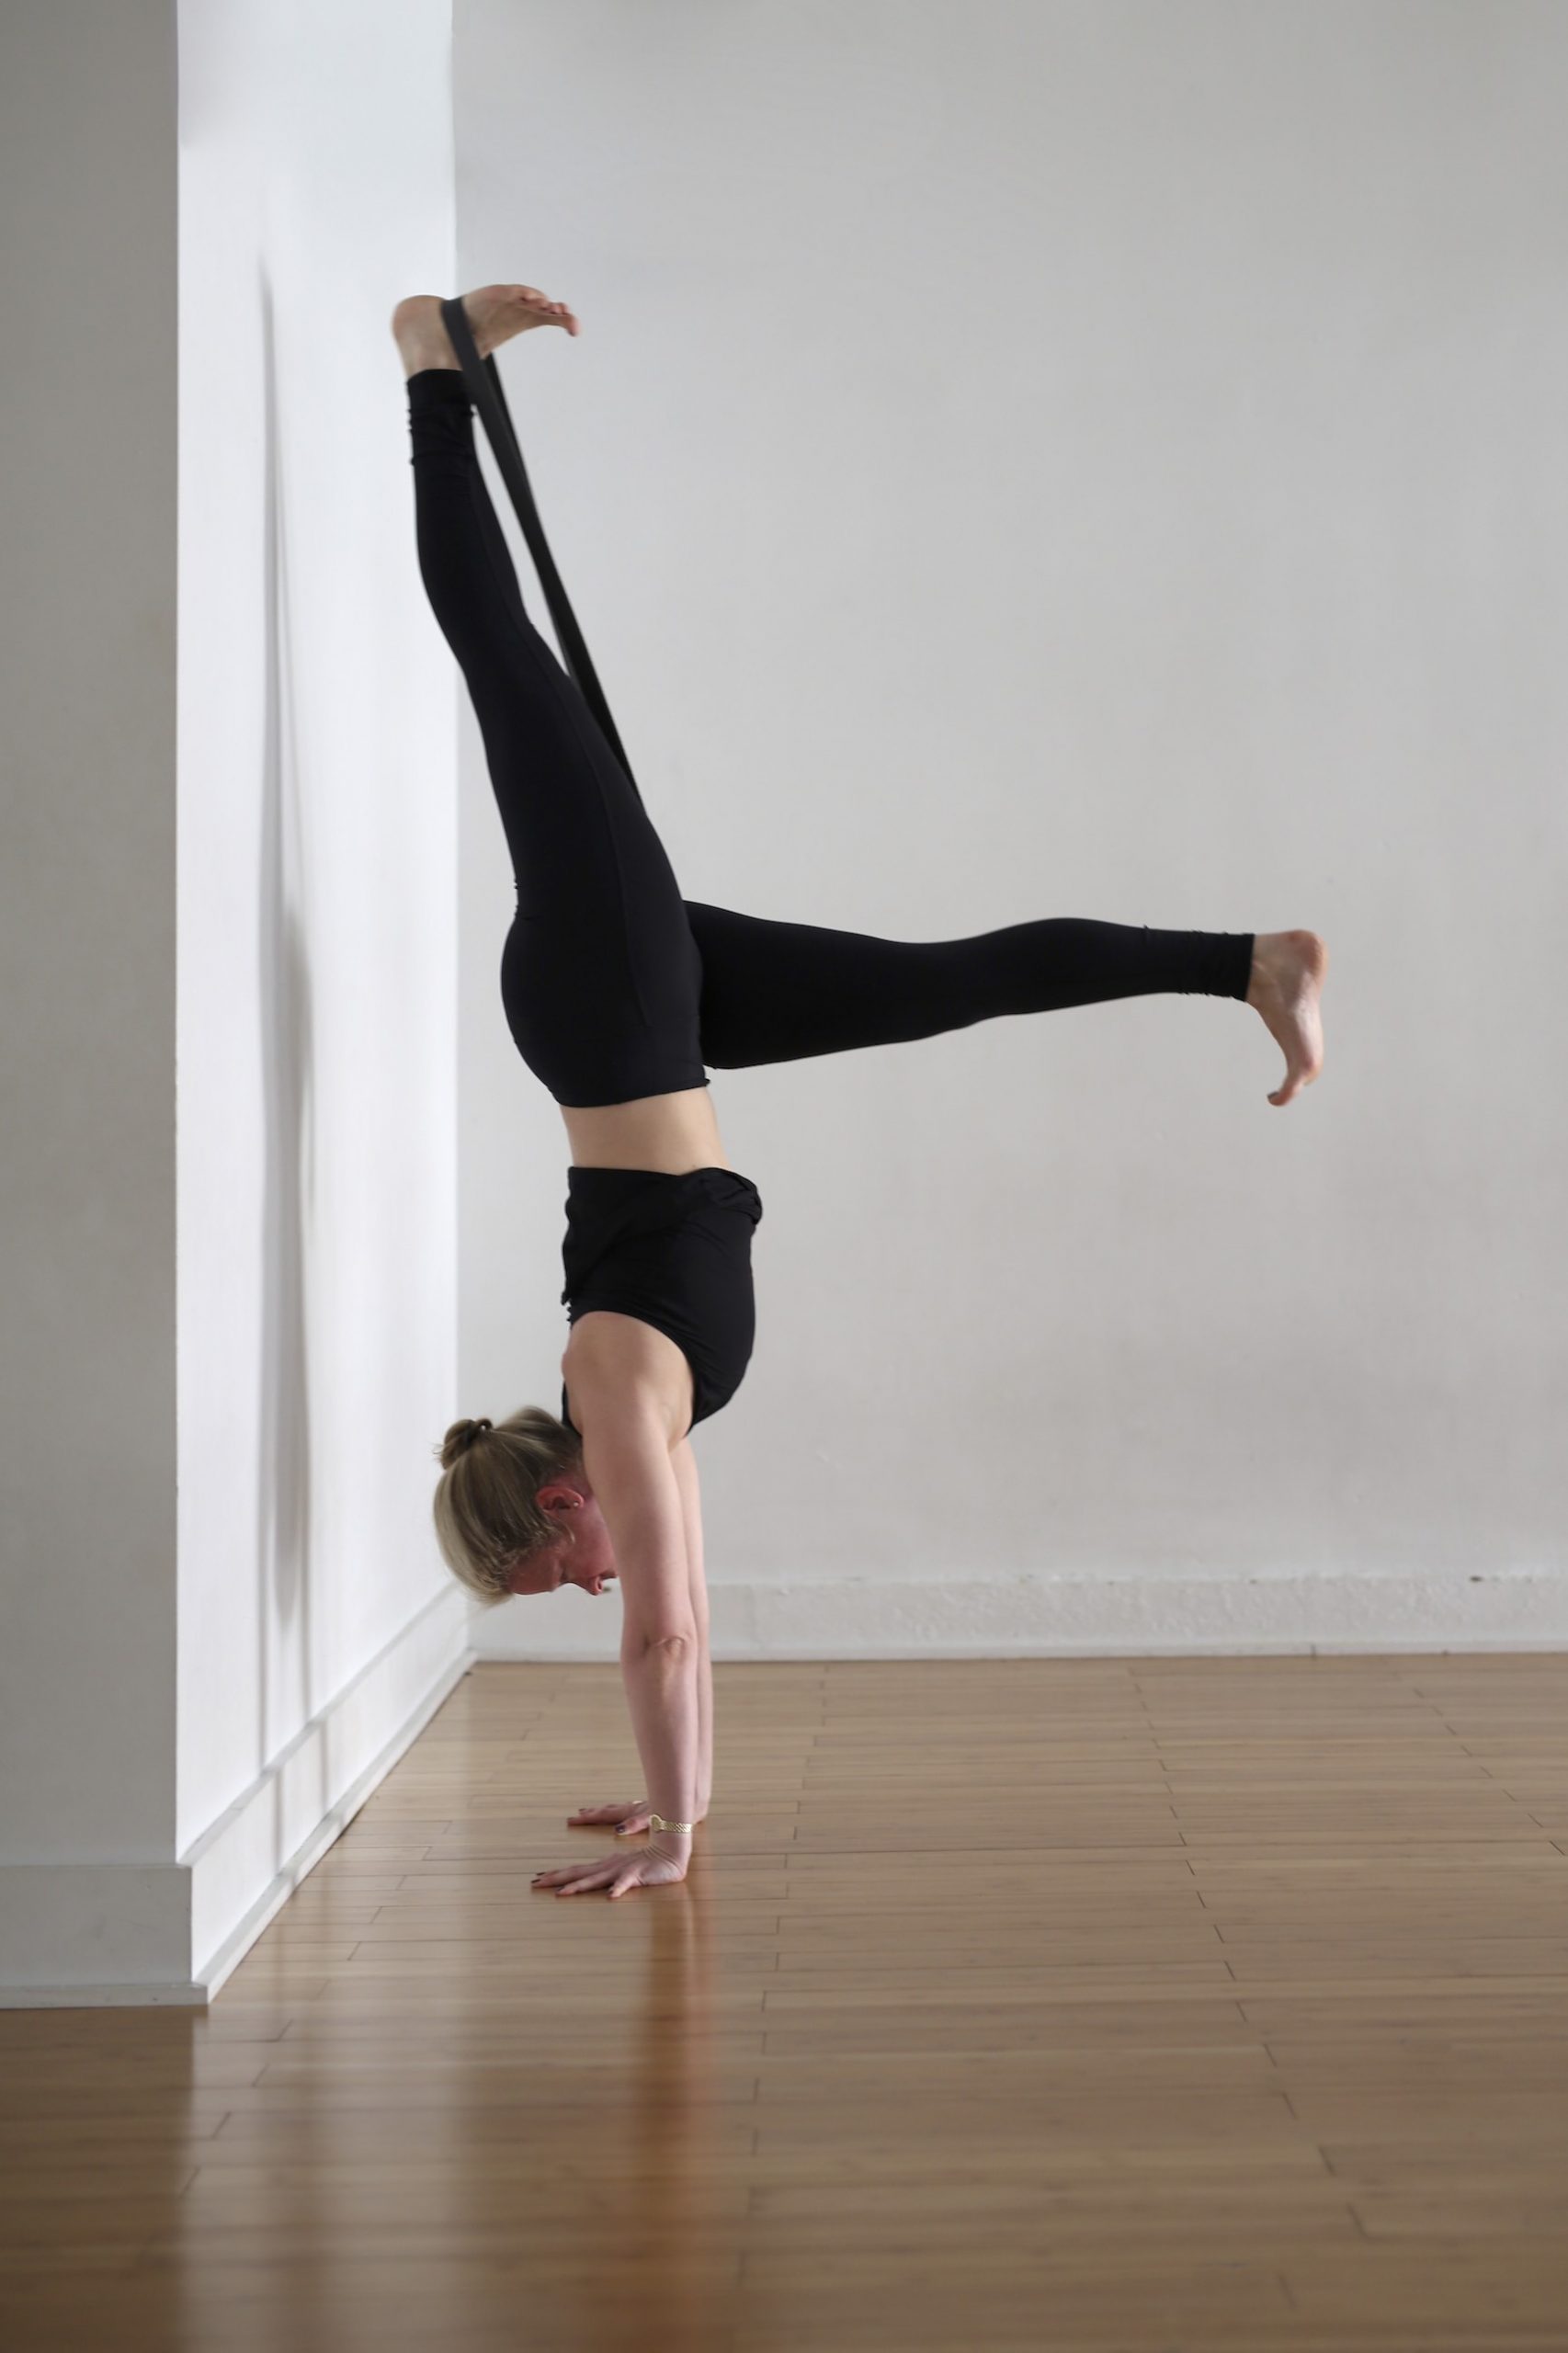
I thought it would be fun to offer a challenging variation of Handstand that mimics the shape of One-Legged Handstand Prep for those of you with more inversions experience. A traction belt around the standing hip and kicking heel reigns in any tendency to splay the pelvis open or externally rotate the kicking leg. It demands a connection to your core and, for me, highlights any blindspots in my arms and scapular stability. If you can get up, maintain the L-shape of the legs—rather than lifting the second leg up into the full arm balance, create the shape of One-Legged Handstand Prep by reaching it actively into the center of the room (otherwise the traction belt will fall off)!
Handstand Prep has been (and continues to be) a hugely illuminating practice for me, revealing infinite layers of understanding about my own physical and mental tendencies. It literally never gets old for me. I think when we get bored with asana, it’s a sign that we’re resting in the comfort of what we know; as a result, we miss out on the opportunity to learn more about the pose, but really, more about ourselves.

What a great sequence Chrissy! Thank you for all the attention to detail.
Chrissy, this such a great sequence! Thank you for putting this together and with such thoughtful instruction.
I’m so glad you found it helpful!