The majority of my creative inspiration comes from wandering around my life with my eyes and heart wide open. Creativity, I find, is like Starbucks—it’s everywhere, unless you’re looking for it, in which case it’s nowhere to be found. One day, while strolling aimlessly through the city, I happened upon a pretty little flower shop where they packaged tiny bouquets in what reminded me of old hat boxes. How cool, I thought! I immediately imagined offering this to someone as a gift. The last thing anyone would expect when opening the box would be a gorgeous bouquet of flowers, and that’s what I just love about this idea—they’ll never see it coming.
As with most creative endeavors, the idea needed time to germinate. I spent months envisioning what it would look like. For me, daydreaming is so important; I need to see it in my mind and feel it in my heart. Then, when the mood strikes, I jump into action.
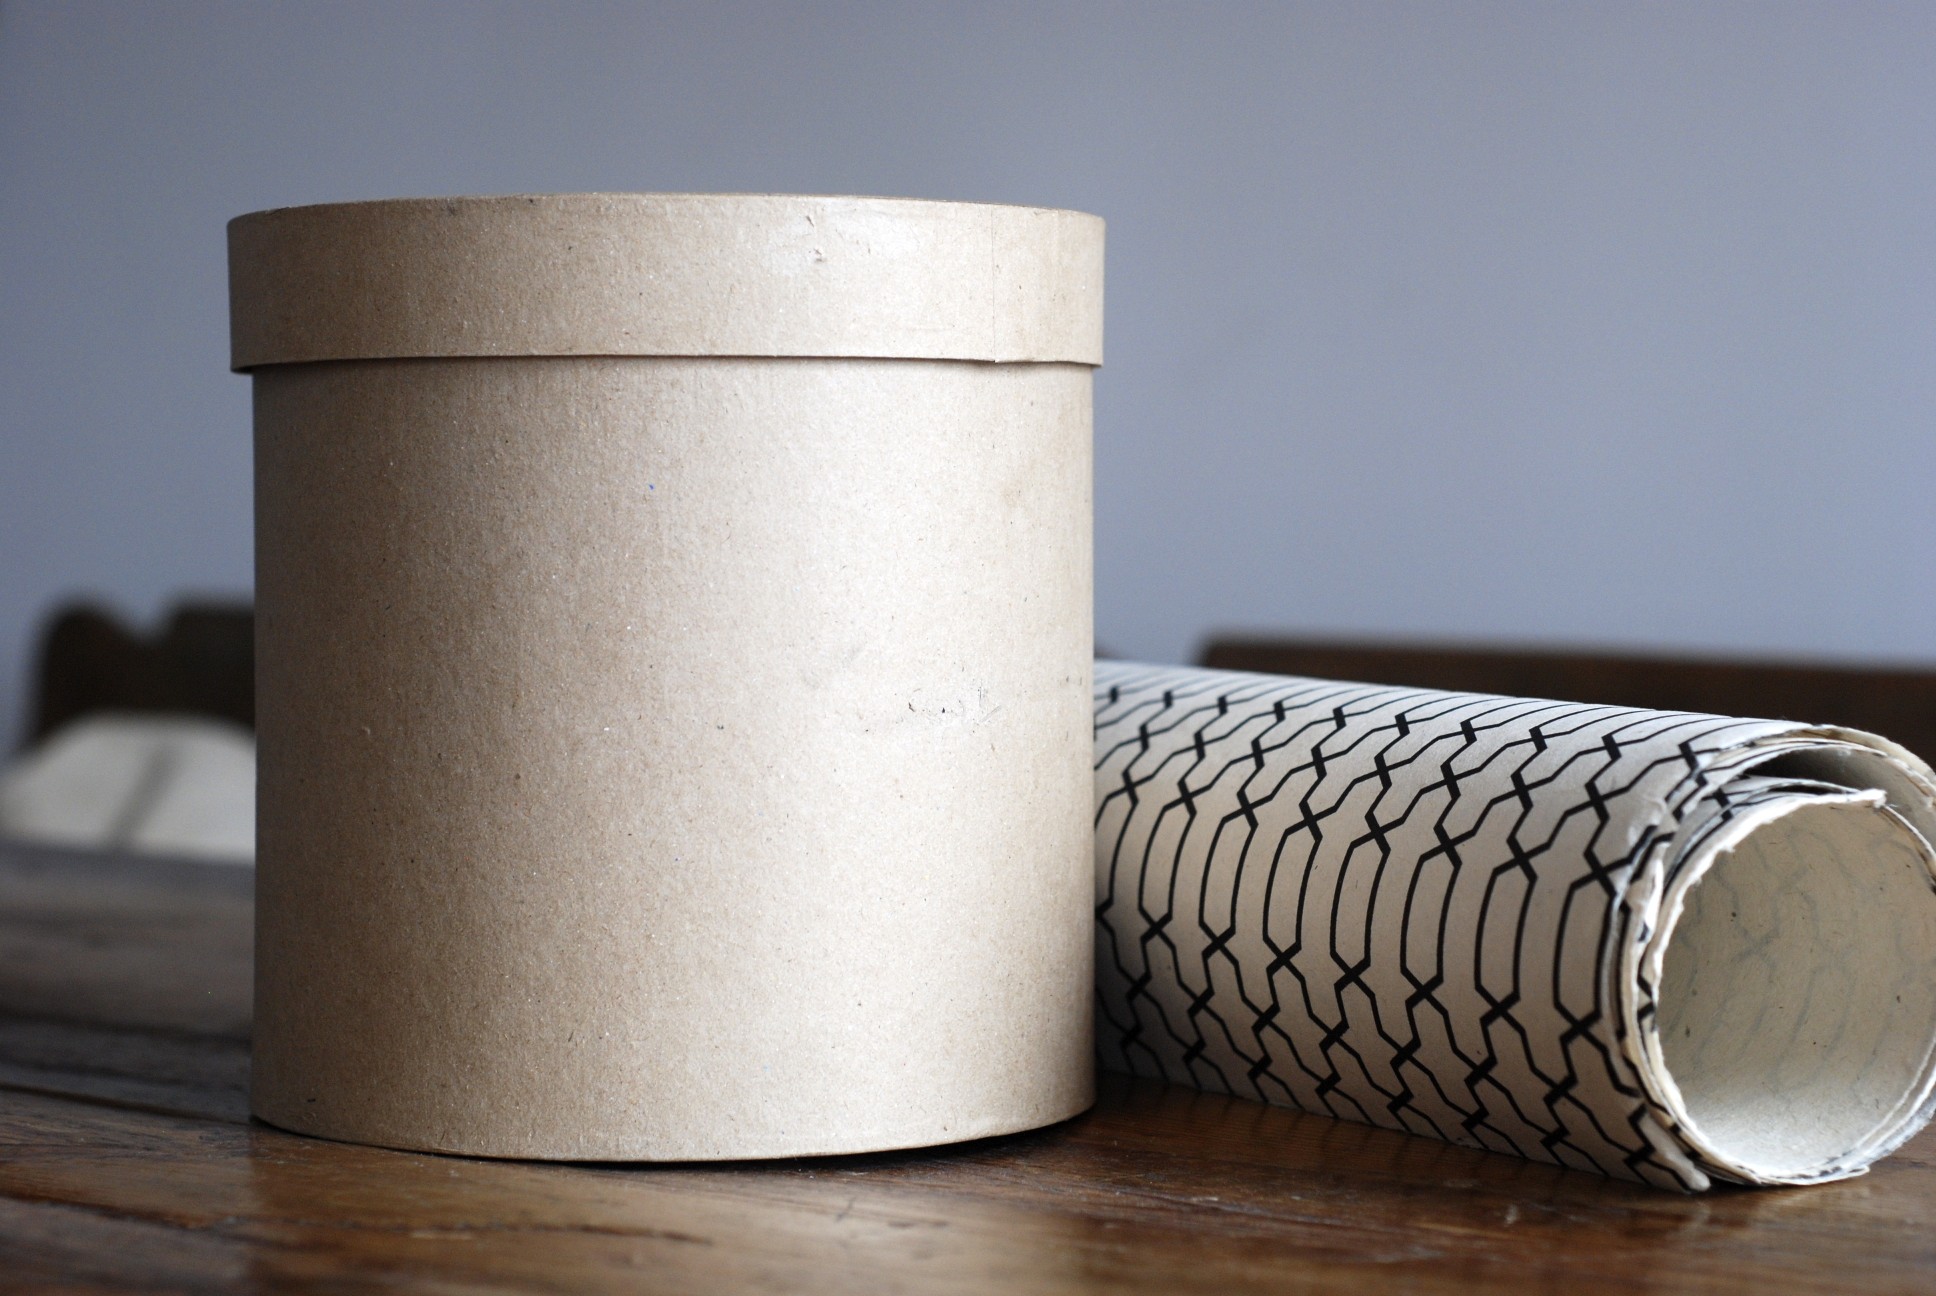
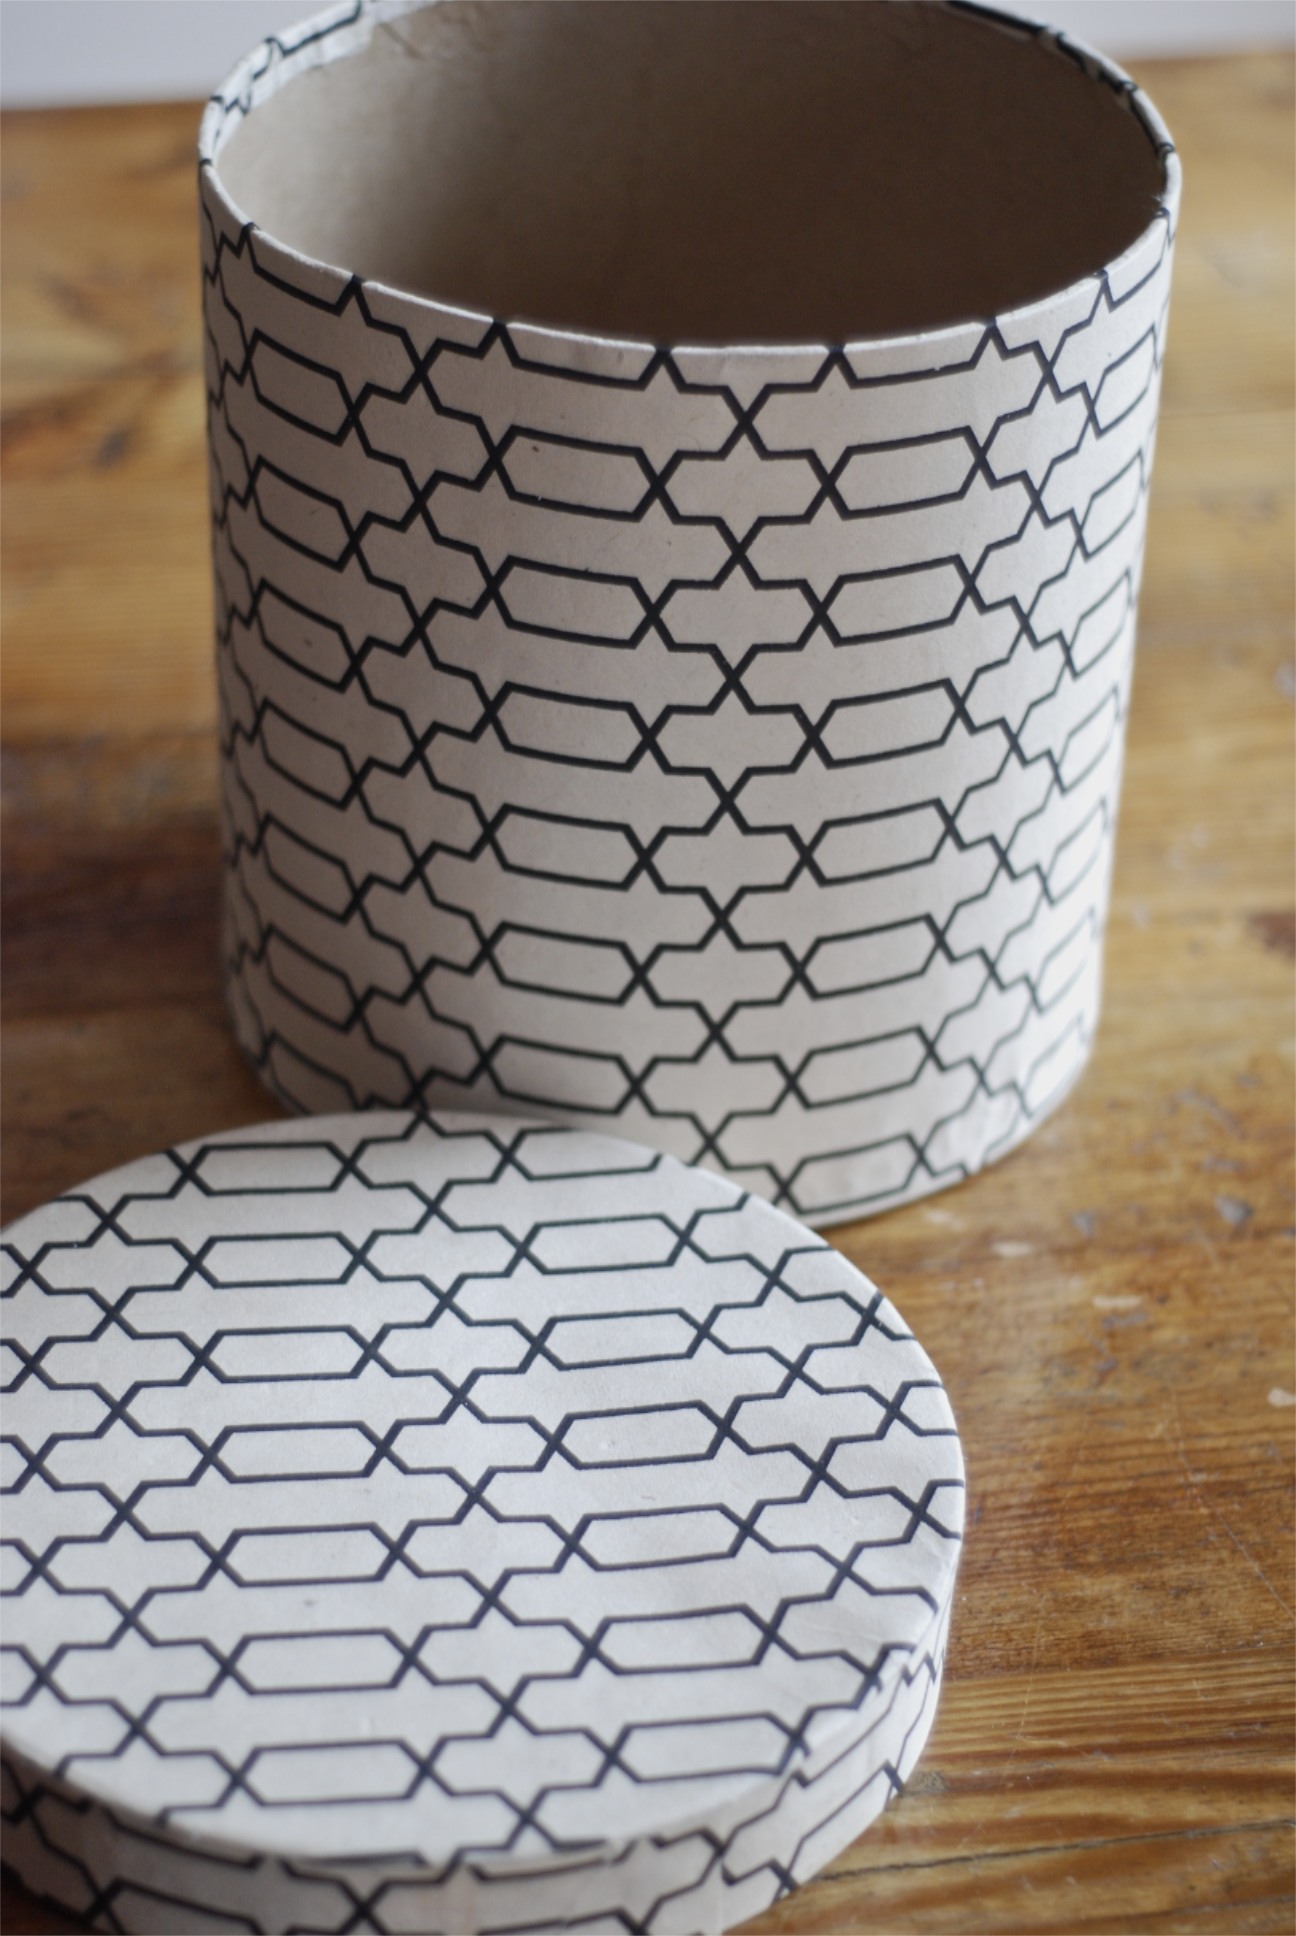
I knew I wanted to cover the box myself, because then I could choose the overall tone of the gift (covering it myself also allowed me to consider the recipient and their style). I also had to find a box big enough and tall enough to fit the flowers. Months later, I found the perfect one at Envelopper on 21st Street.
And then I waited. When I impose myself on a project, it never feels the way I had hoped it would. So I have to wait for the wave of inspiration to carry me to shore. My mother’s birthday was the impetus to take action; I knew she would appreciate every detail of what I had imagined that very first moment in the flower shop.
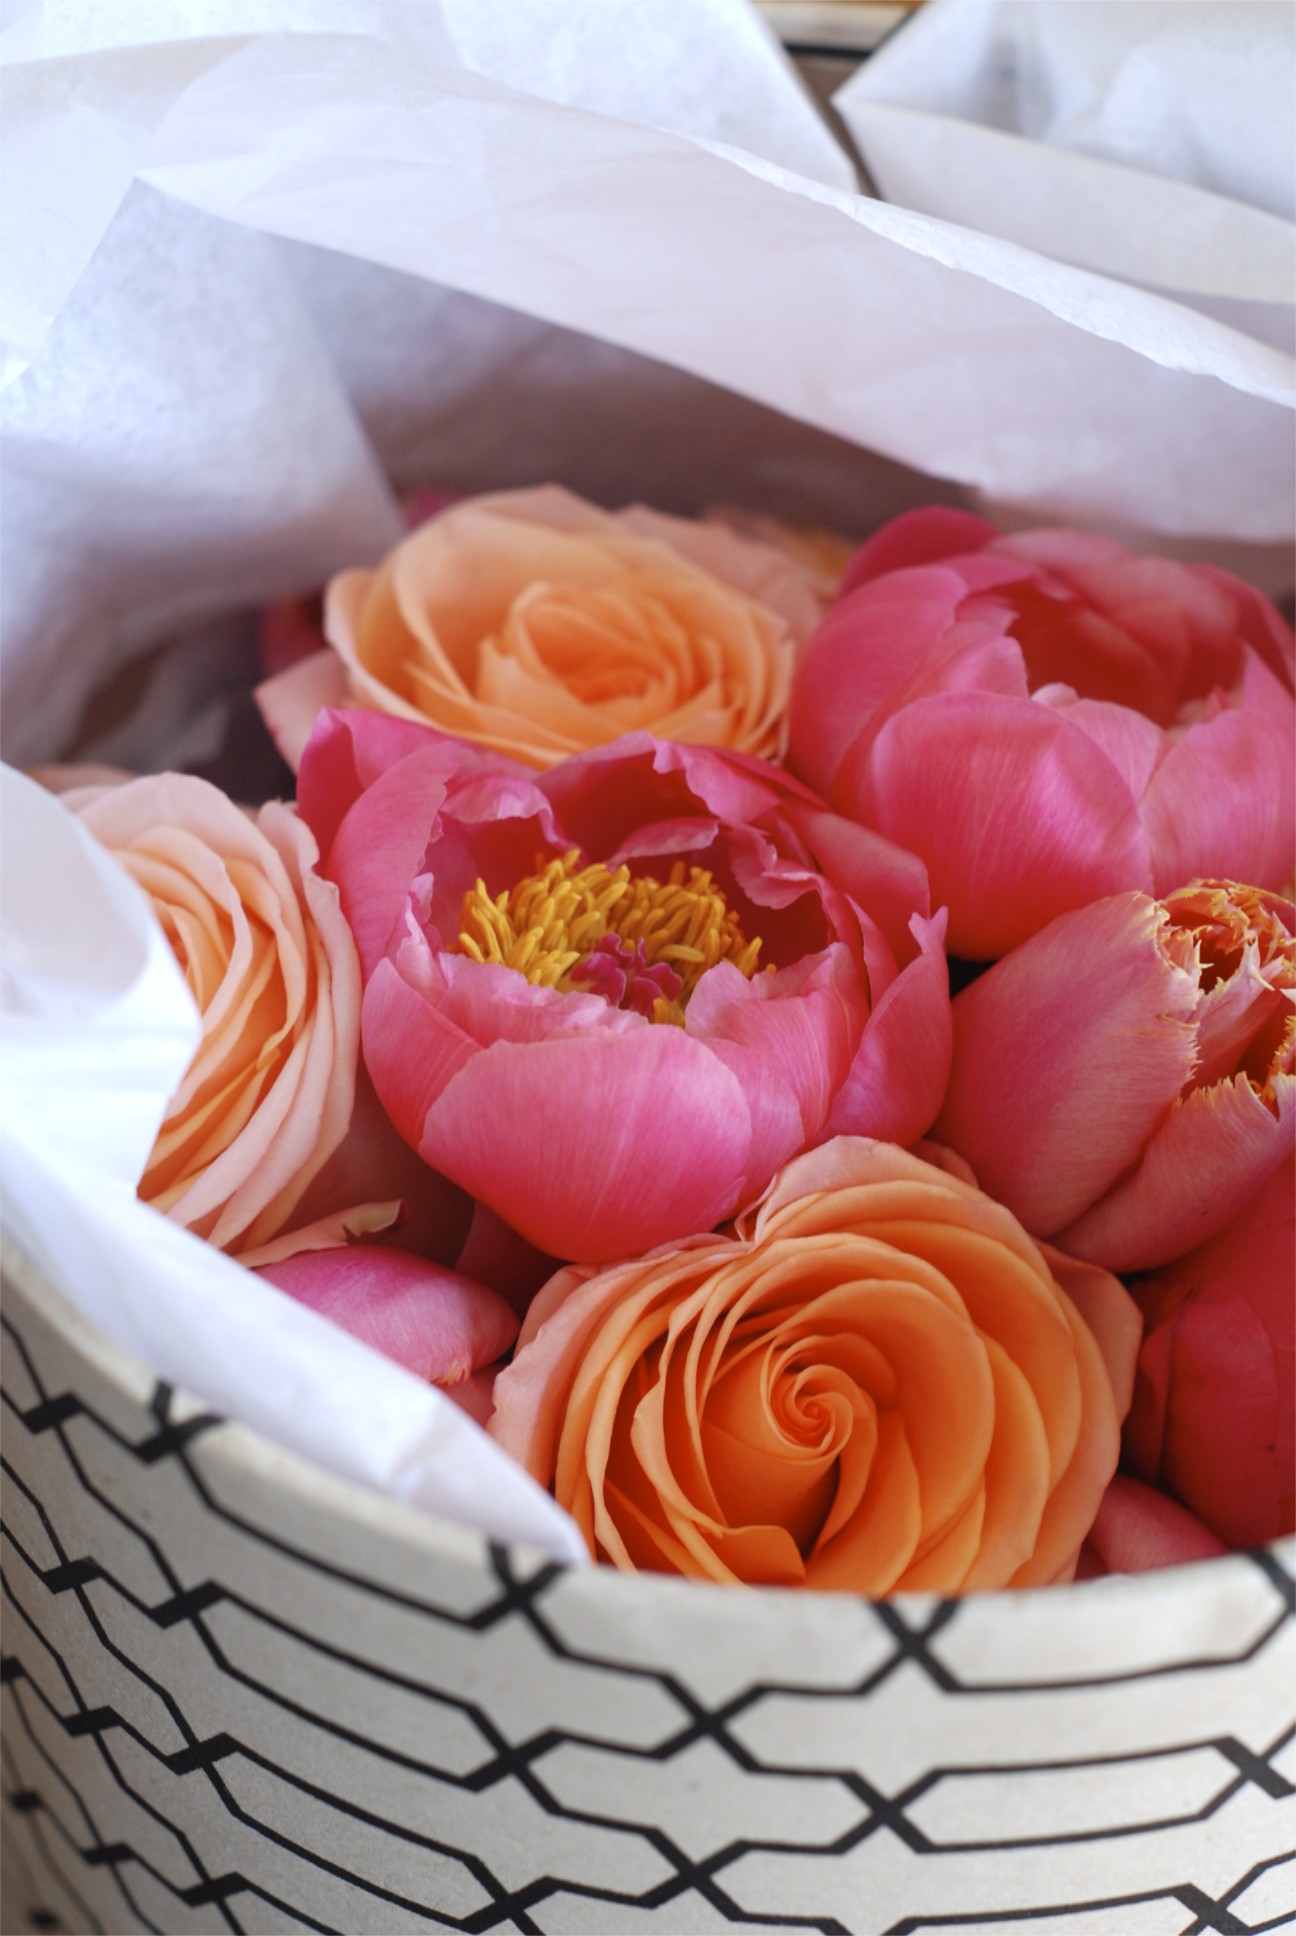
I found some cool wrapping paper at Paper Presentation on 18th Street. I thought the black and white graphic would look great juxtaposed with the color and softness of the flowers, and I knew that the design would work well with my mom’s aesthetic. So I ventured home one day with a big bouquet of pink flowers—peonies, roses, and tulips—and got to work!
To make the box, you’ll need scissors and glue. I used Scotch scrapbooker’s glue because it’s heavy-duty and because it comes with its own applicator. You’ll also need several sheets of whatever paper you end up choosing.
Here are the steps:
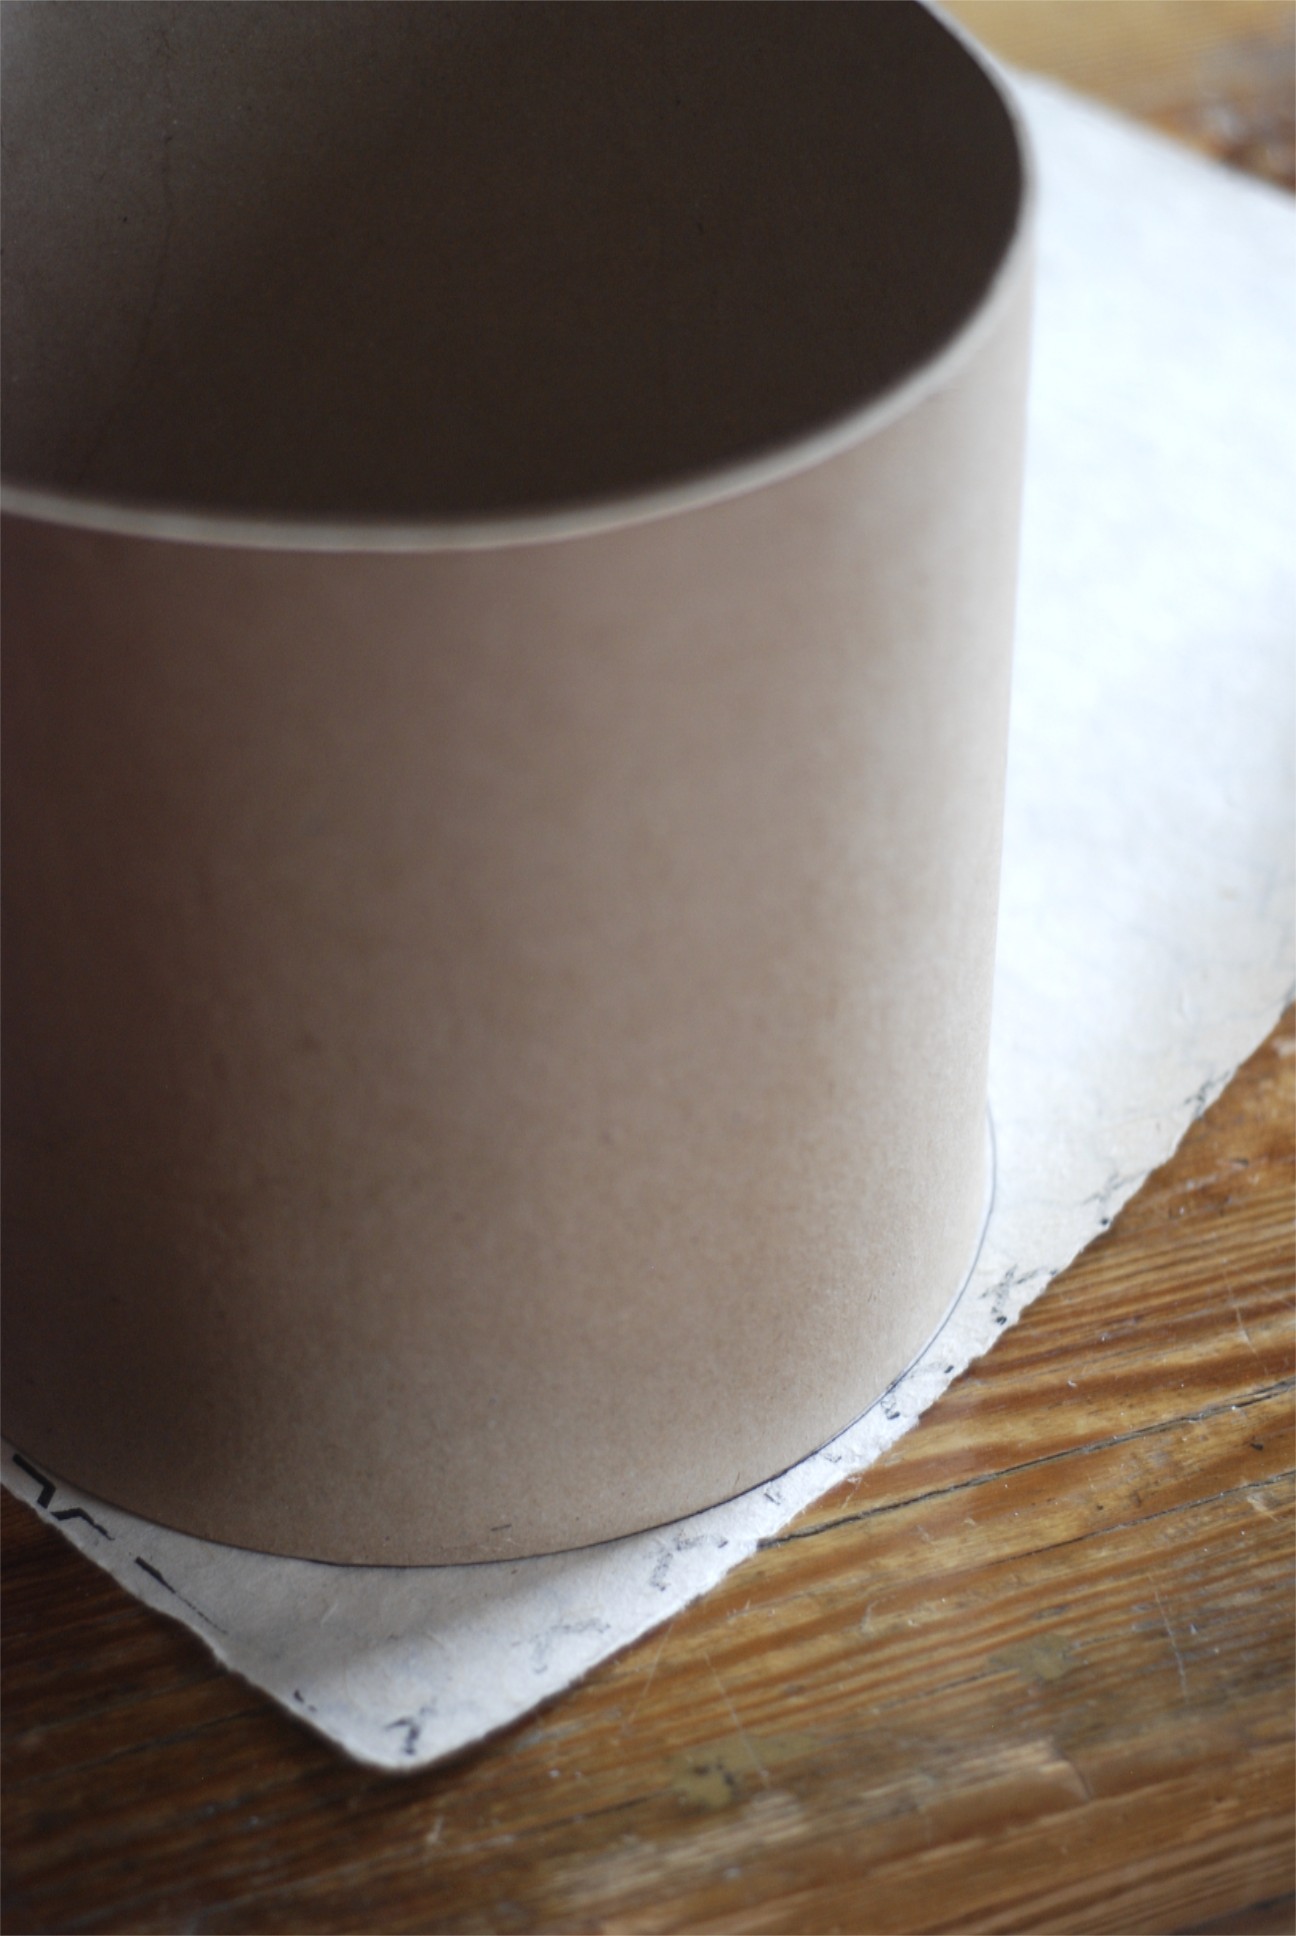
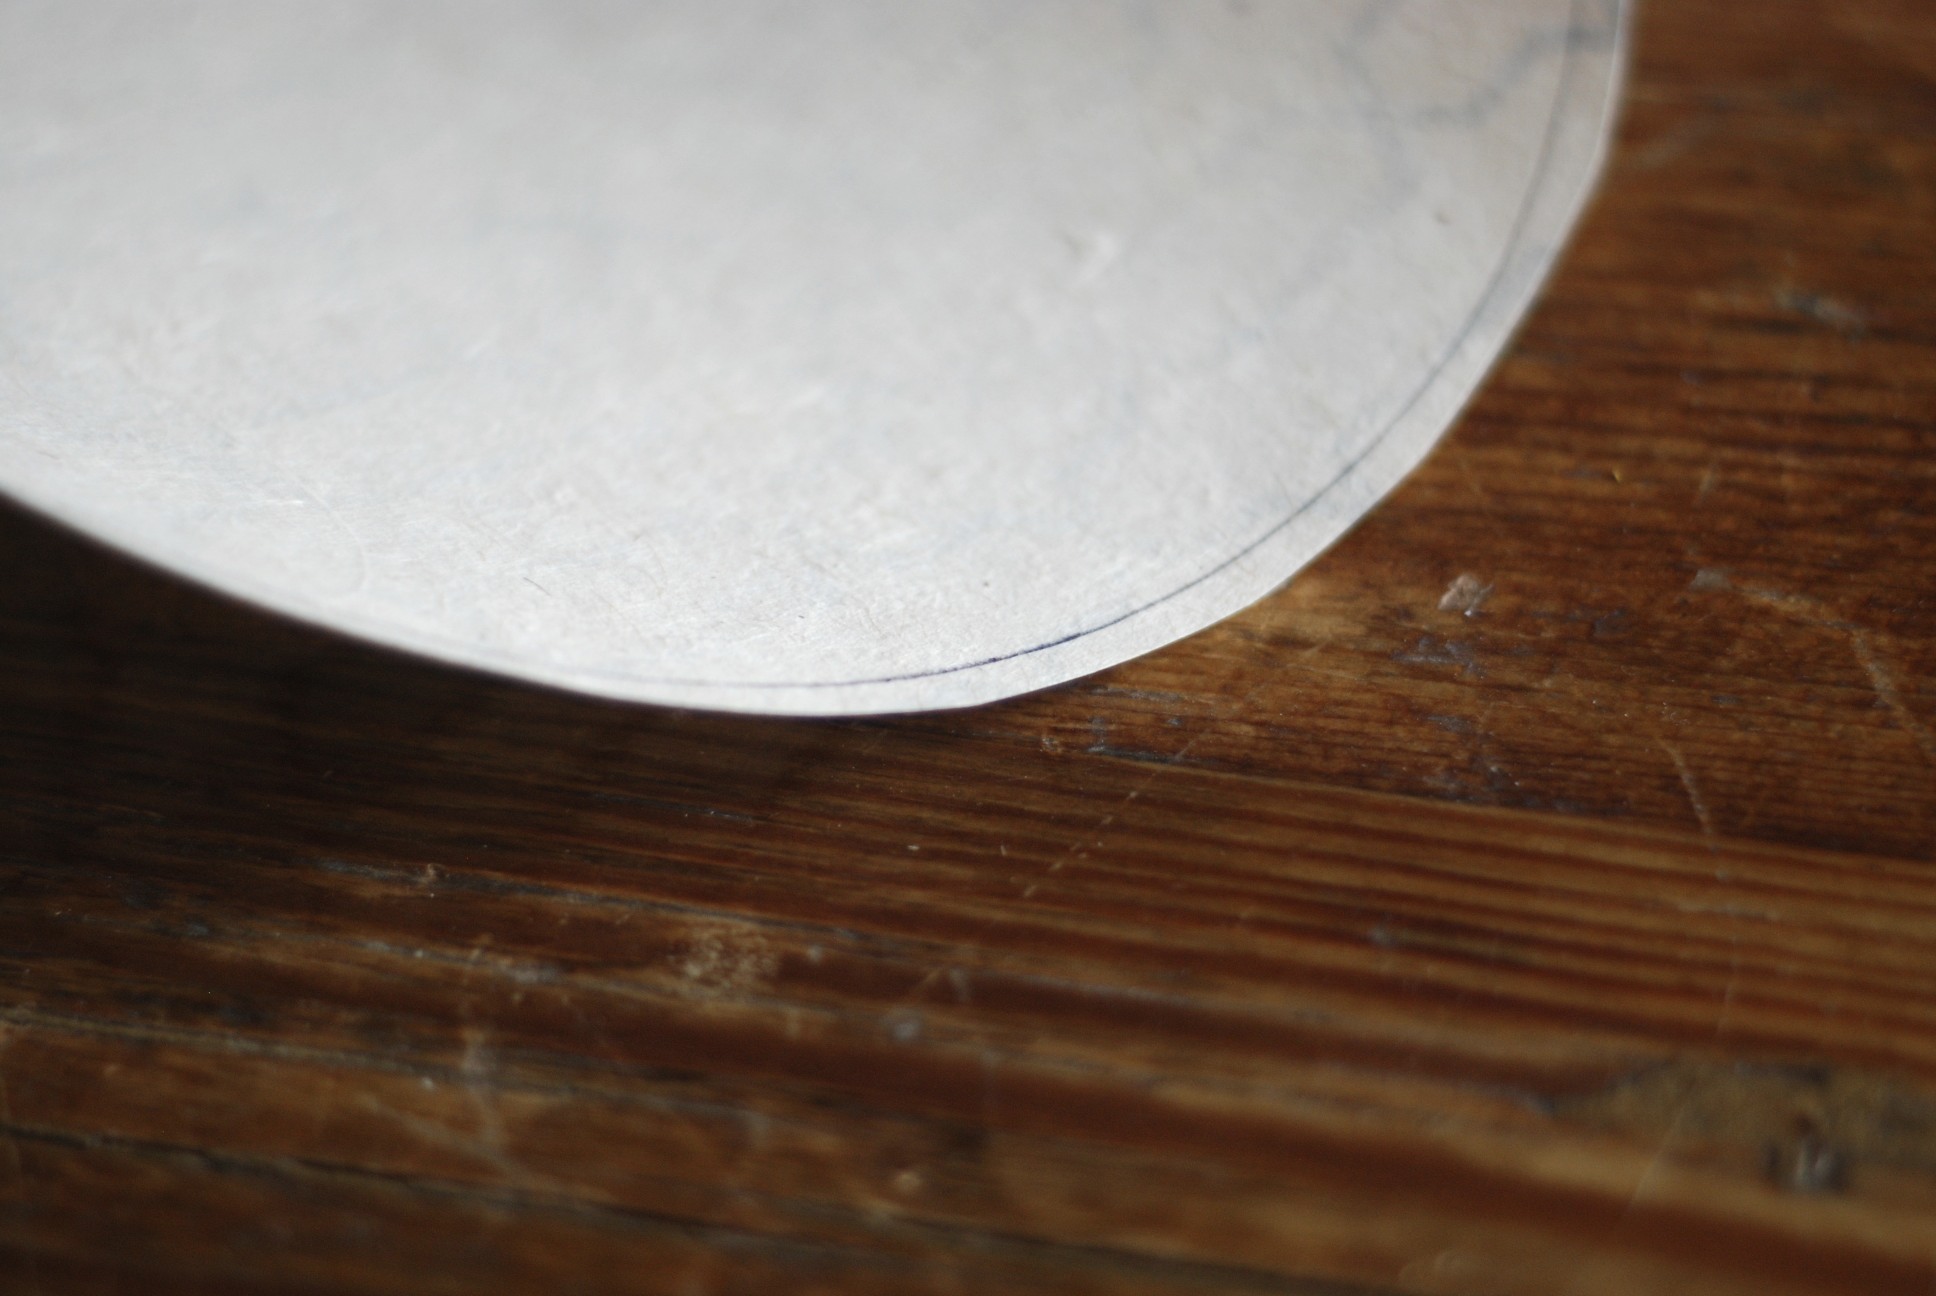
1) Trace the diameter of the box onto your paper. Do this twice – one circle to cover the lid, and one to cover the base.
2) Cut out both circles adding an extra 1/4 inch to the diameter. This will give you just enough extra paper to fold over the sides without it being too bulky.
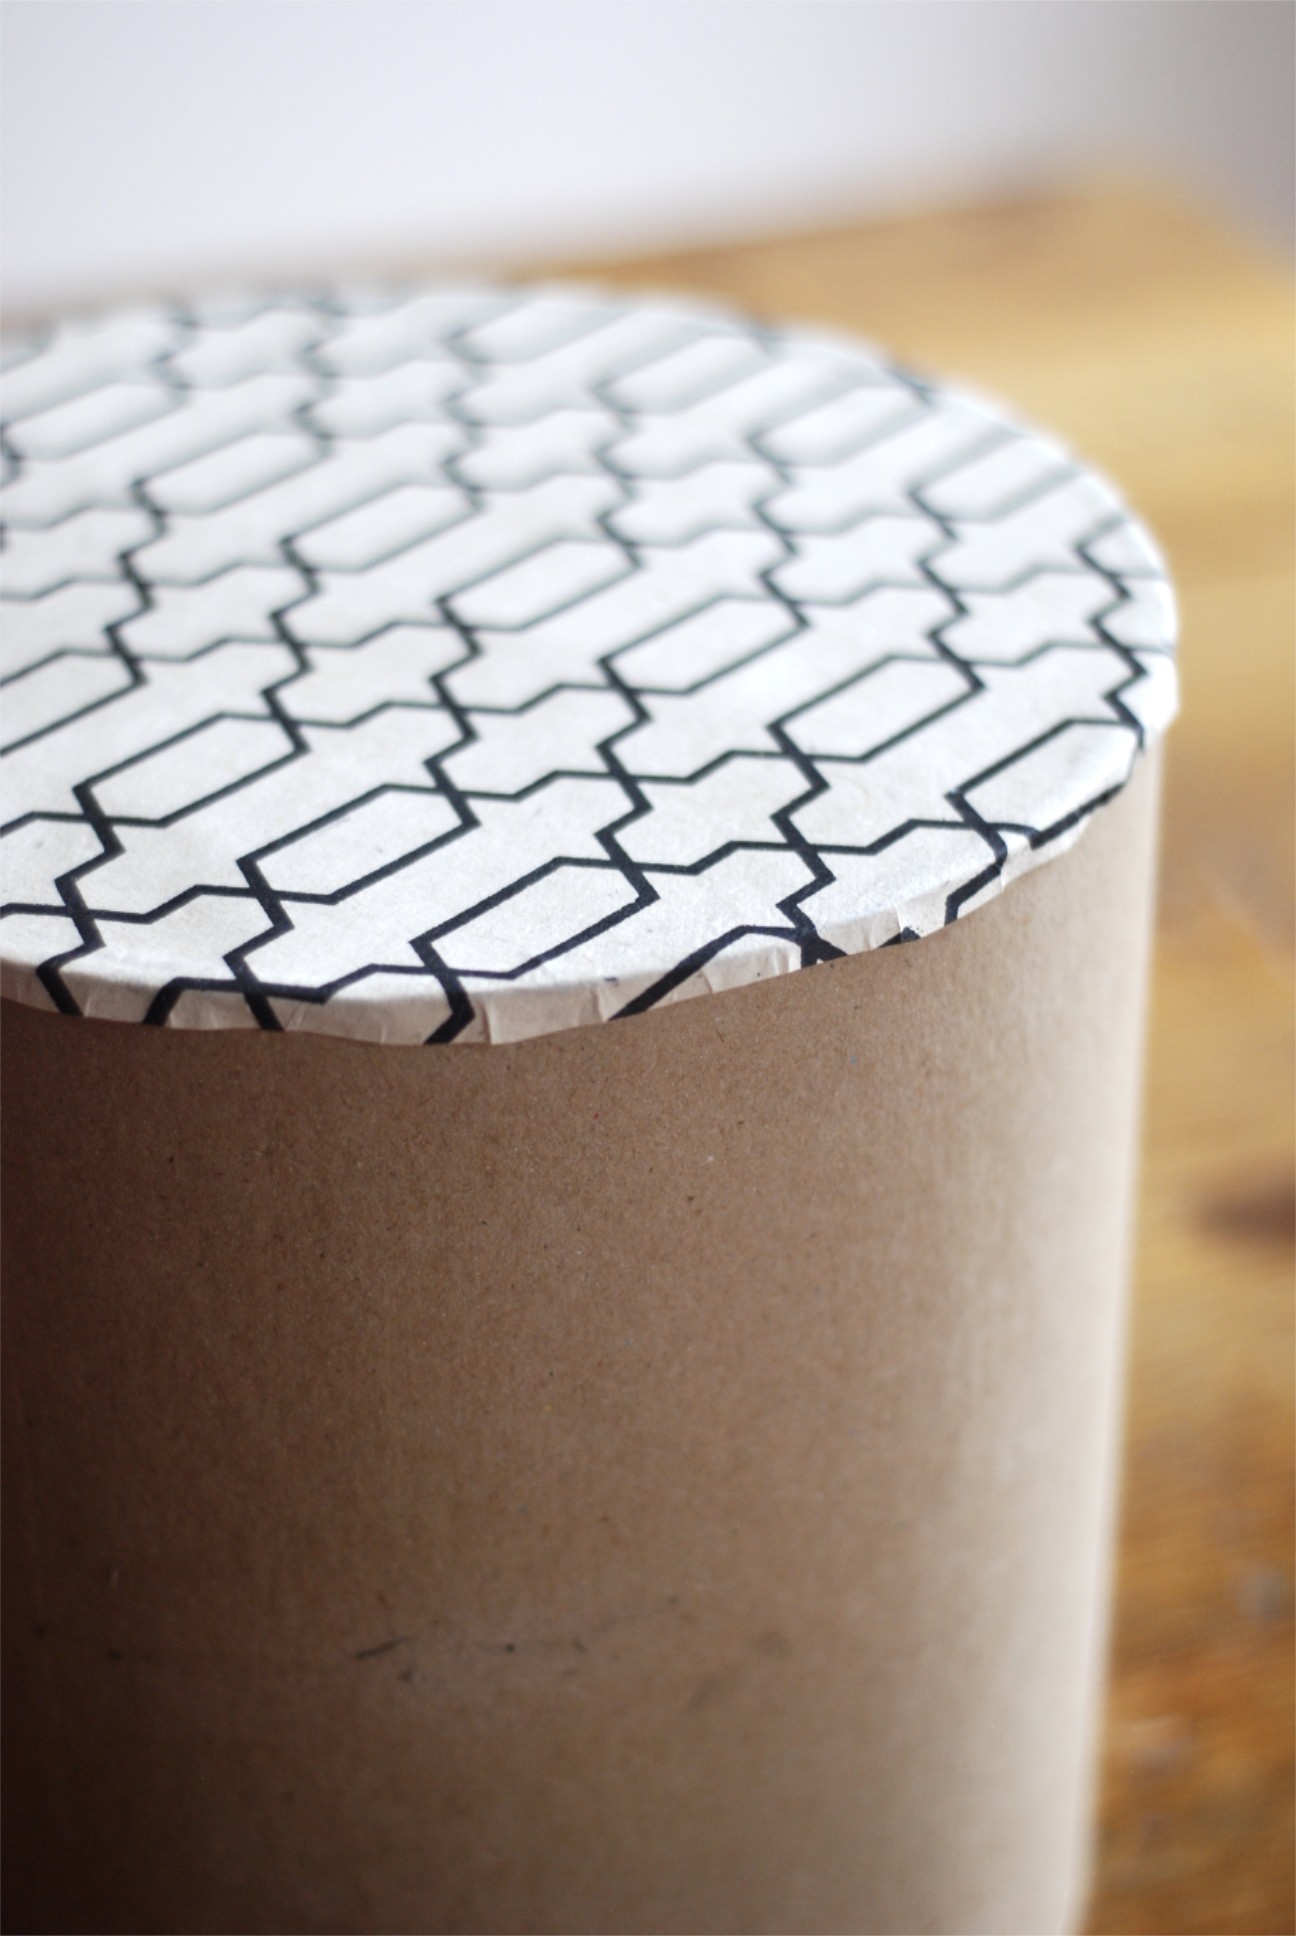
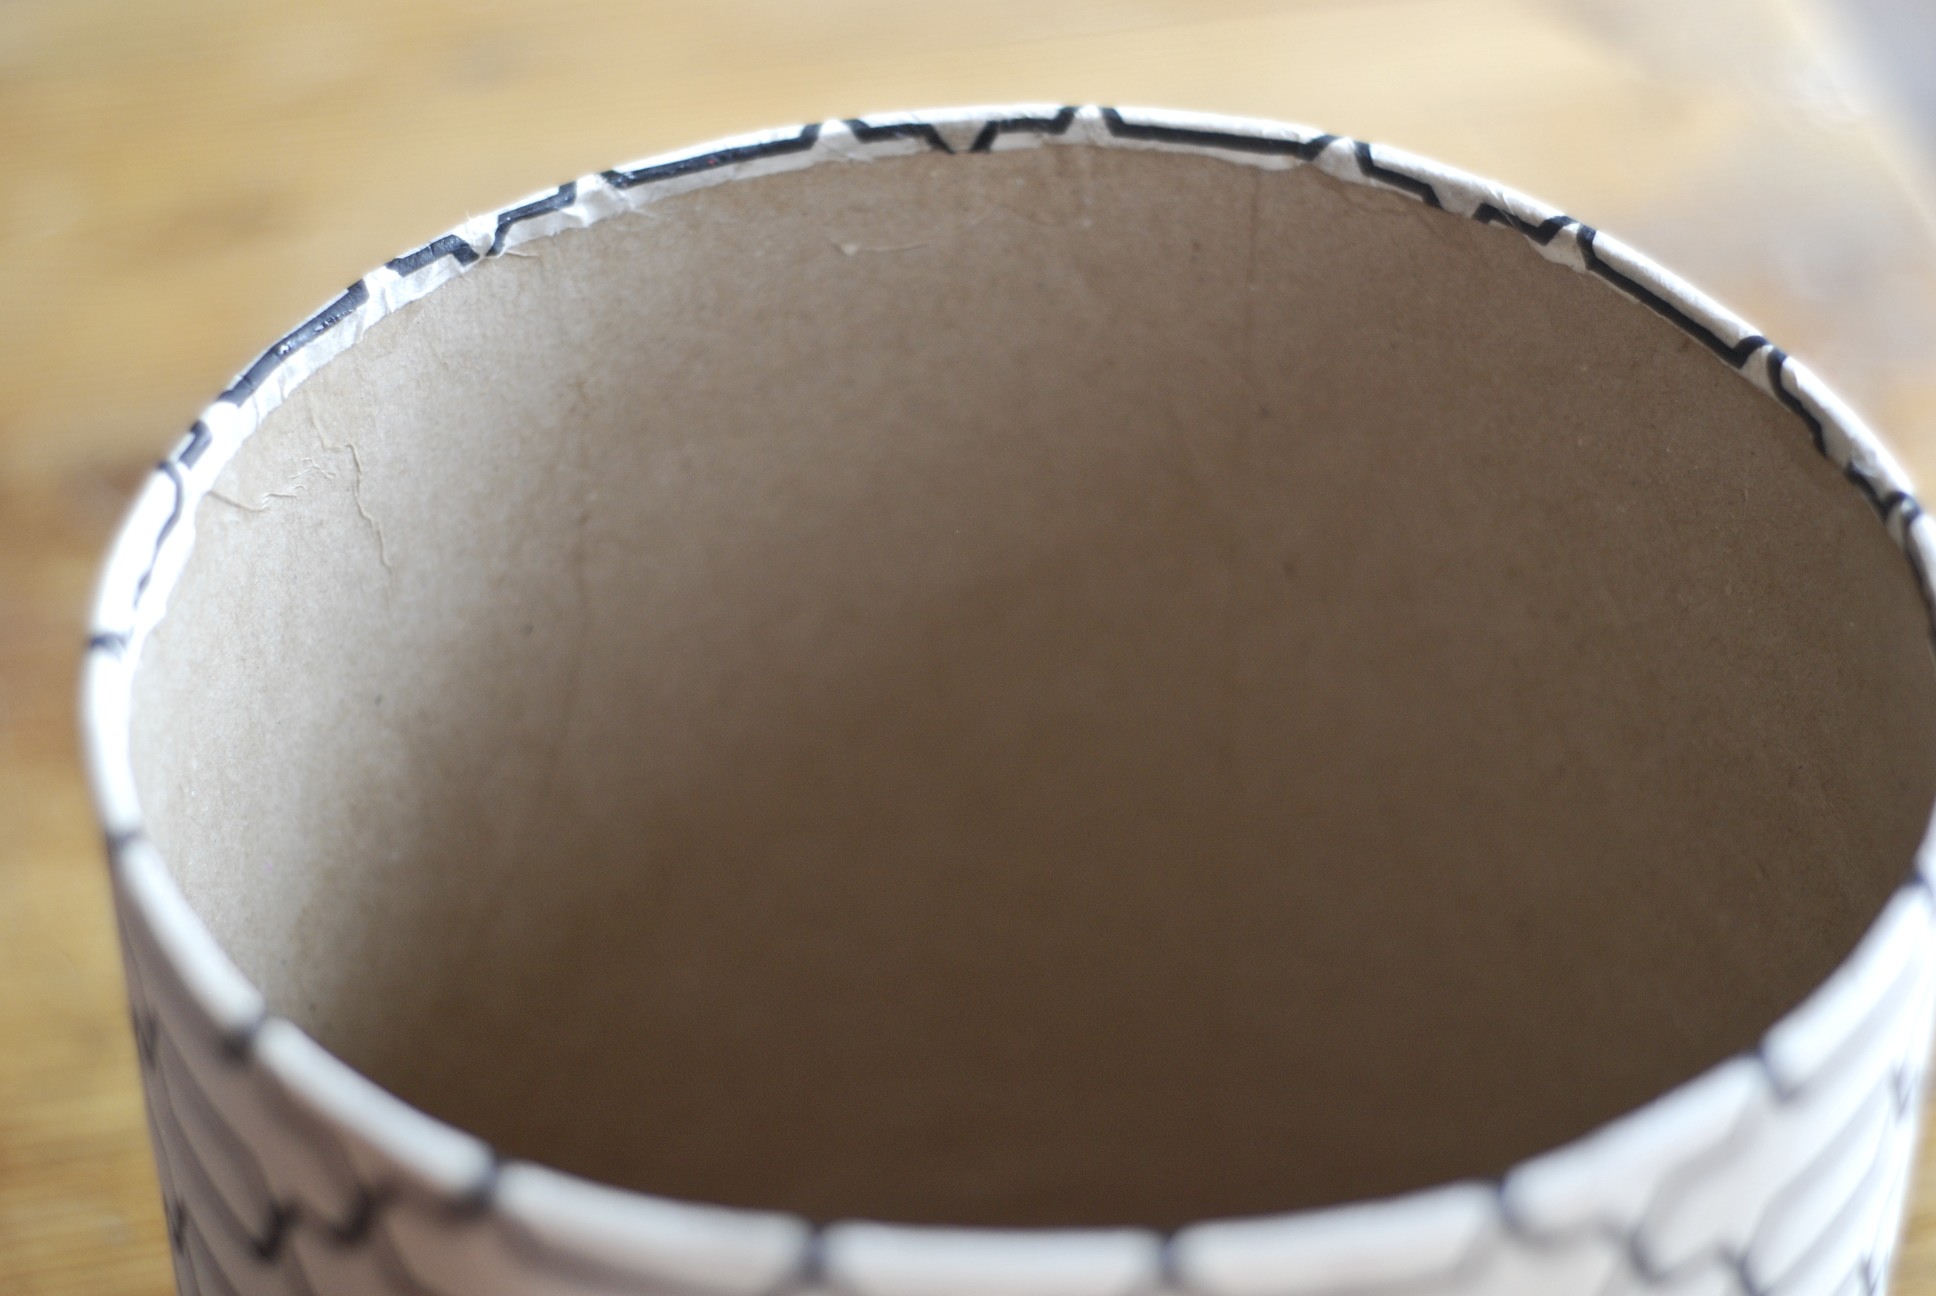
3) Brush a thin layer of glue around the circumference of the lid. Carefully line up your paper with the lid and fold over the edges with your fingers. Work your way around the lid with your fingers to make sure the paper is not only sticking, but also laying flat. You’ll likely get glue all over your fingers, which will help to seal the edges in place.
4) Repeat this process for the bottom of the box.
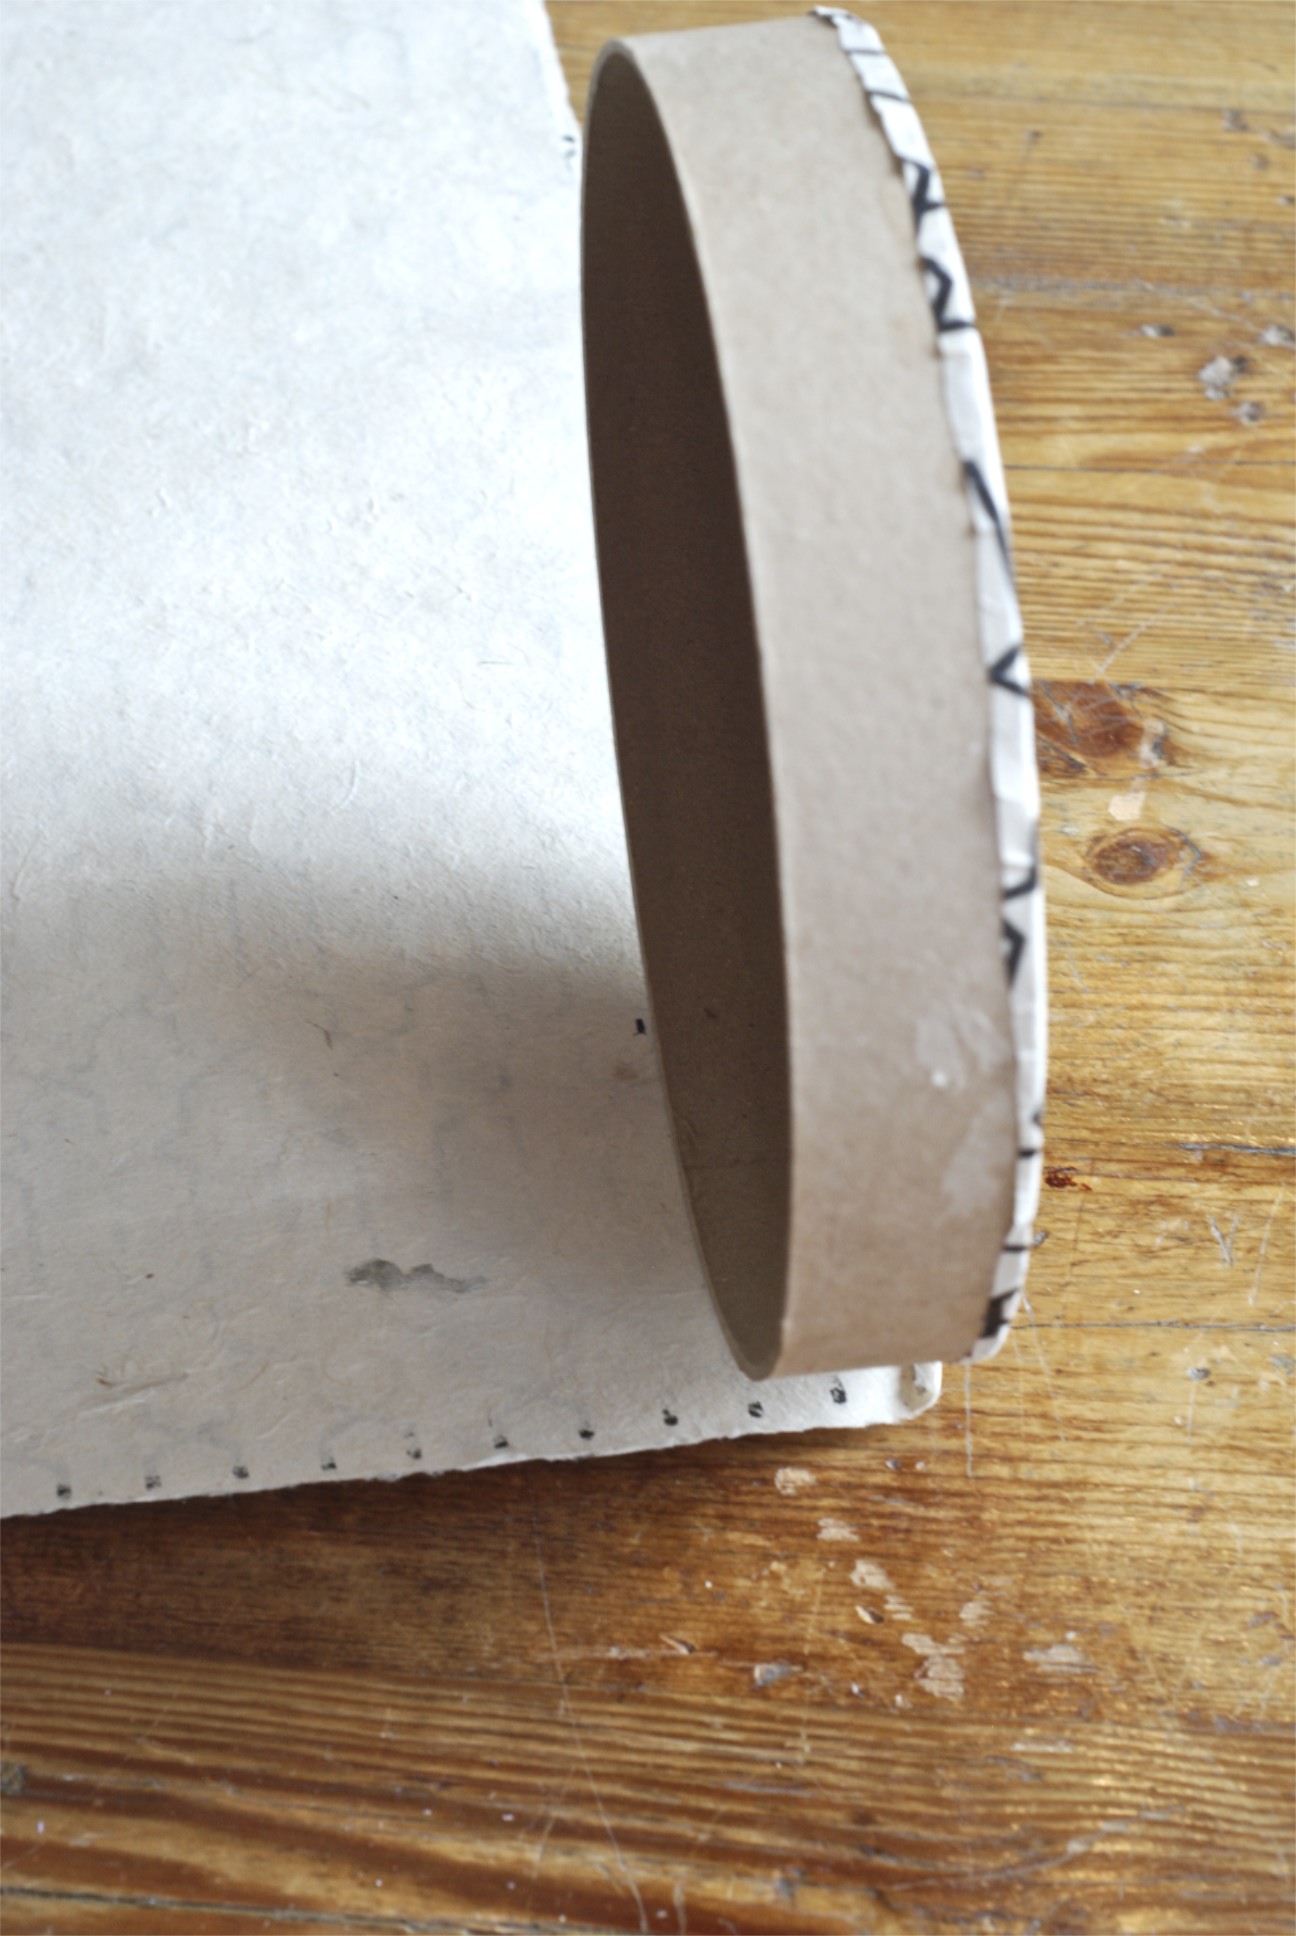
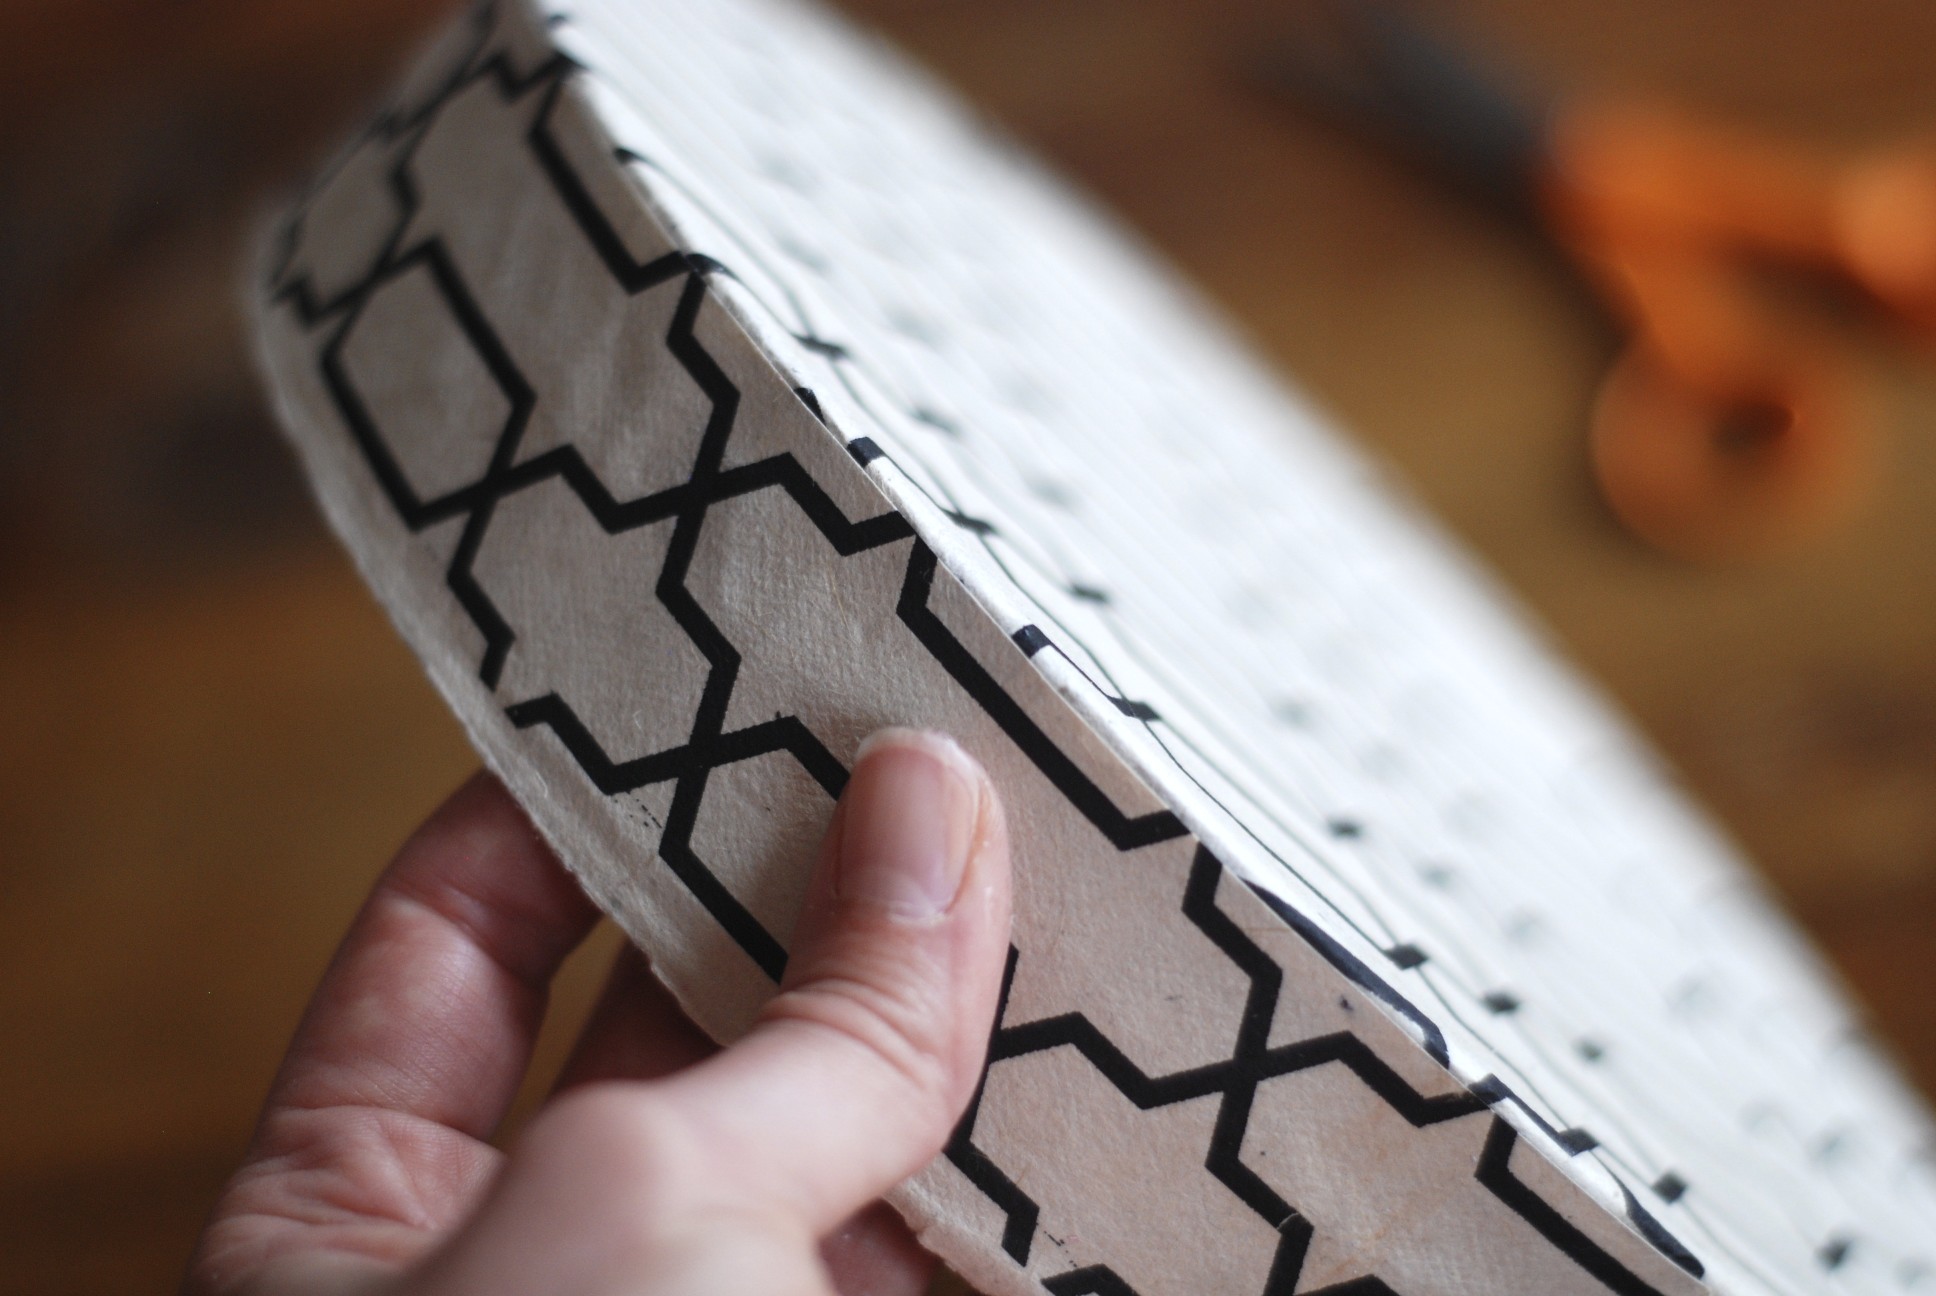
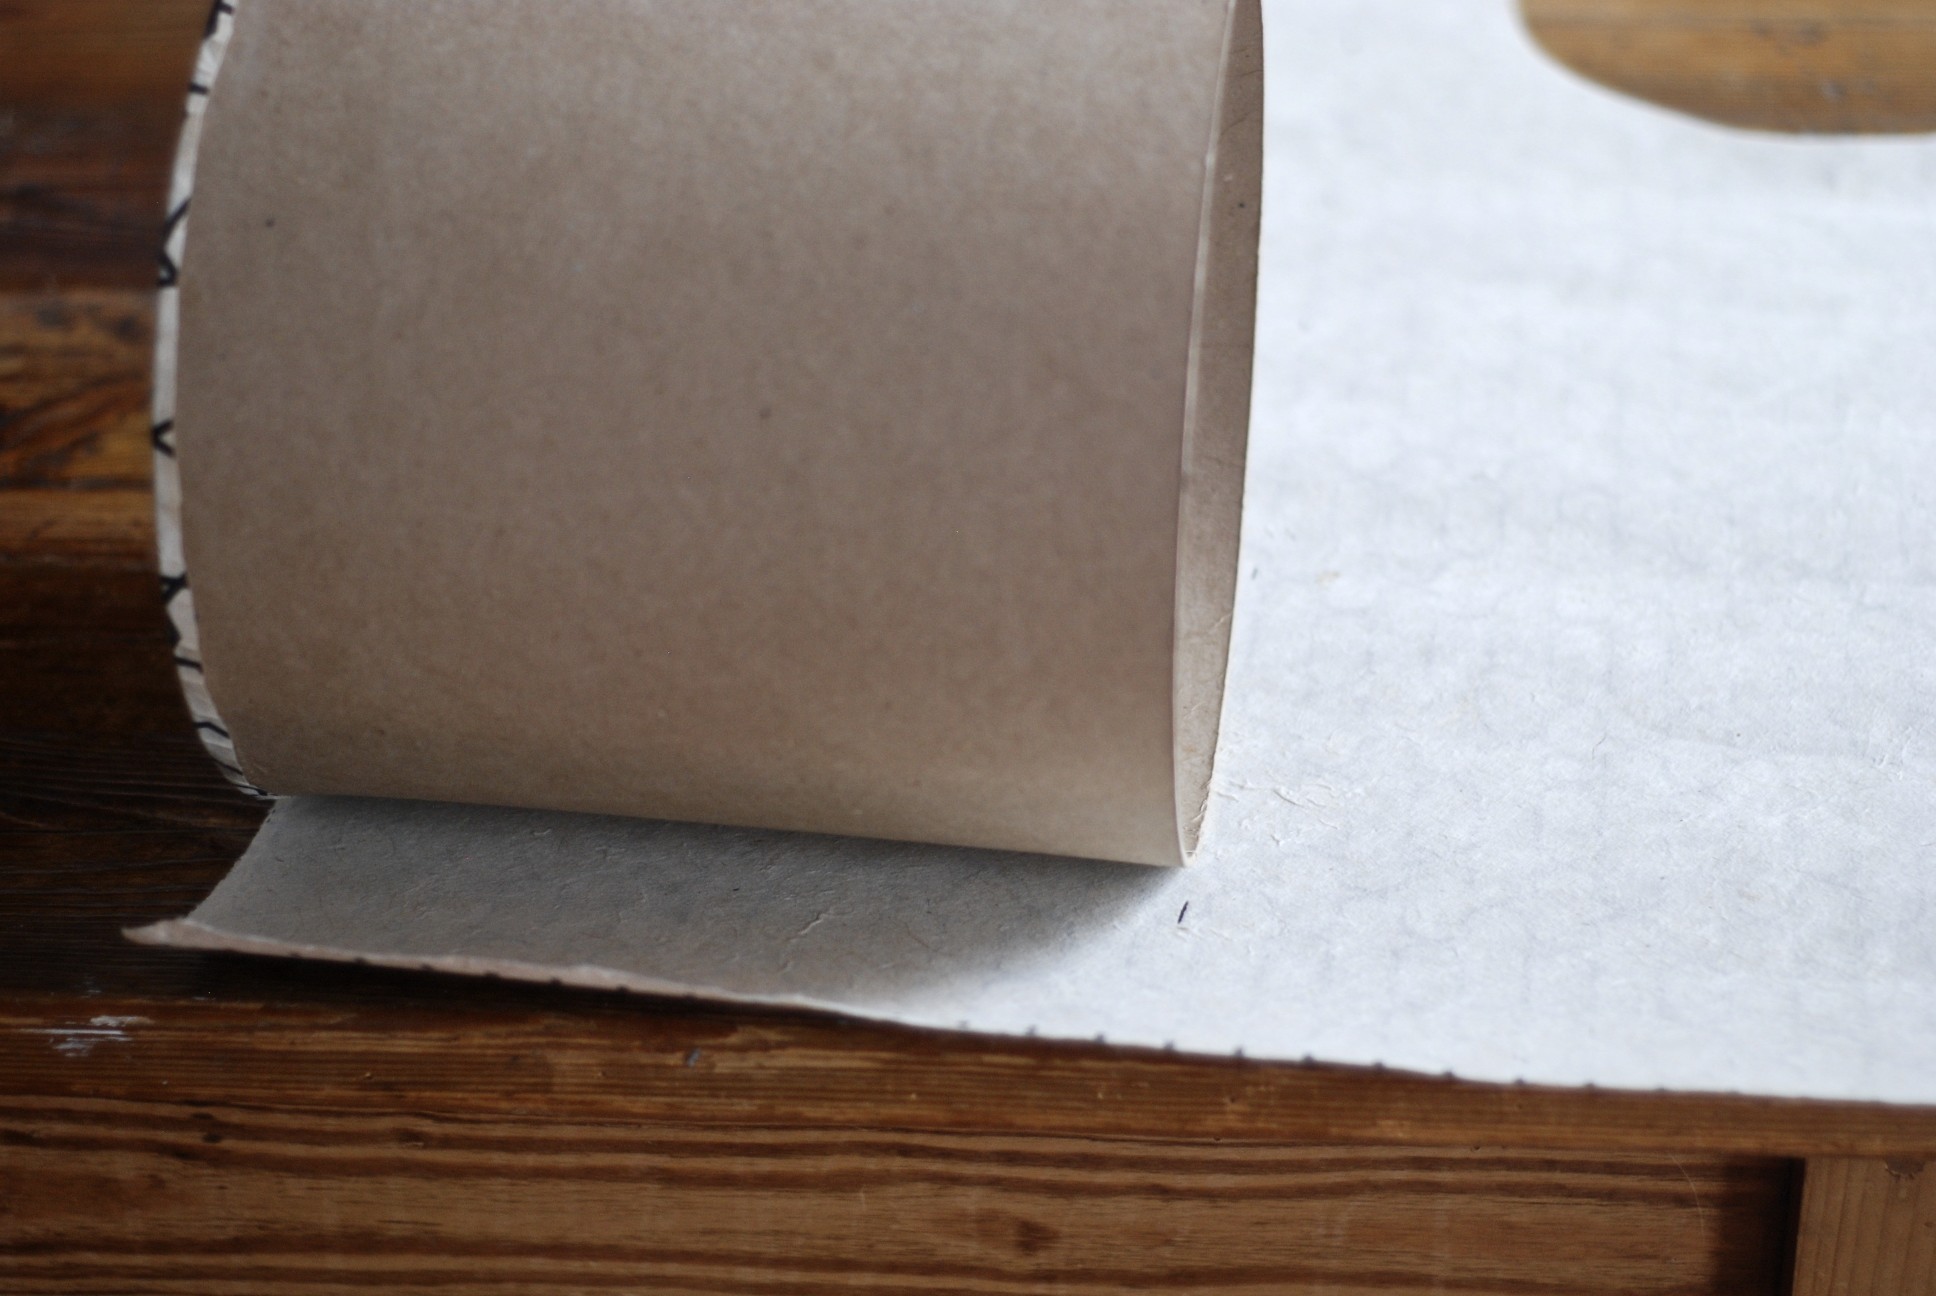
5) Now you need to cut out a long strip to cover the side of the lid. Place your lid sideways on the paper to measure the width. You can roll the lid along, marking the paper every few inches. Using a straight edge (I used the edge of a book), connect all of the dots to draw a straight line. Again, leave an extra 1/4 inch so you can wrap the paper around the inside of the lid.
6) Brush a thin layer of glue around the side of the lid. Use a light hand – a little goes a long way and you don’t want so much that it bleeds through the paper. Carefully adhere the paper to the glue. If you have too much paper, you can cut it where the two ends meet. Not enough paper? Just cut out another tiny strip and glue it in place.
7) Repeat the process for the box, itself. Leave an extra 1/4 inch to fold around the inside of the box.
8) C’est fini! Let the entire thing dry before putting the lid on top.
Now for the flowers! I like to work with one color because it allows the textures of the flowers to pop. It’s also an easy way to create a cohesive bouquet, especially if you’re not sure what you’re doing. You’ll need to use a small vase; a small jar works really well (I gave my mom the lid to the jar so she could reuse the jar once the flowers die). Fill the vase with no more than an inch of water so that it doesn’t slosh around while your gift is in transit.
To create the bouquet, first choose your starting bloom—the largest or the prettiest—to be the focal point. Working one at a time, arrange each flower around your initial stem. Don’t worry about the length of the stems – you will cut them once you’re finished creating your bouquet. Have fun with the process. You can always start over! Be sure the bouquet has dimension – it will look full and luscious if the blooms are different heights, with the center flowers peaking out a little taller than the ones on the periphery. Once you’re happy with your creation, hold the bunch tightly in your hands and trim the stems. Tip: I hold the bouquet up next to the vase to estimate where I’ll need to cut. You can always re-cut, so best to be conservative so you don’t get stuck with stubby little stems!
Bunch up a few sheets of tissue paper to create a bed in which your vase can nestle. Then carefully line the box with a sheet (maybe two) of tissue paper for presentation. Carefully place your bouquet inside the box and take a moment to admire your efforts!
To see the look on my mother’s face when she opened the box was by far the best part of the entire experience. Not only will she enjoy the pretty flowers, but she can enjoy the box forever. The creative process will continue as she ponders where she’s going to put the box and what she’s going to use it for – it’s the gift that keeps on giving! This would be the perfect present for a hostess, or a “just because” offering to someone you love. Be patient with your creativity – so much of it is about going with the flow and losing yourself in the process. I can’t think of a more beautiful way to practice.


Join the Discussion