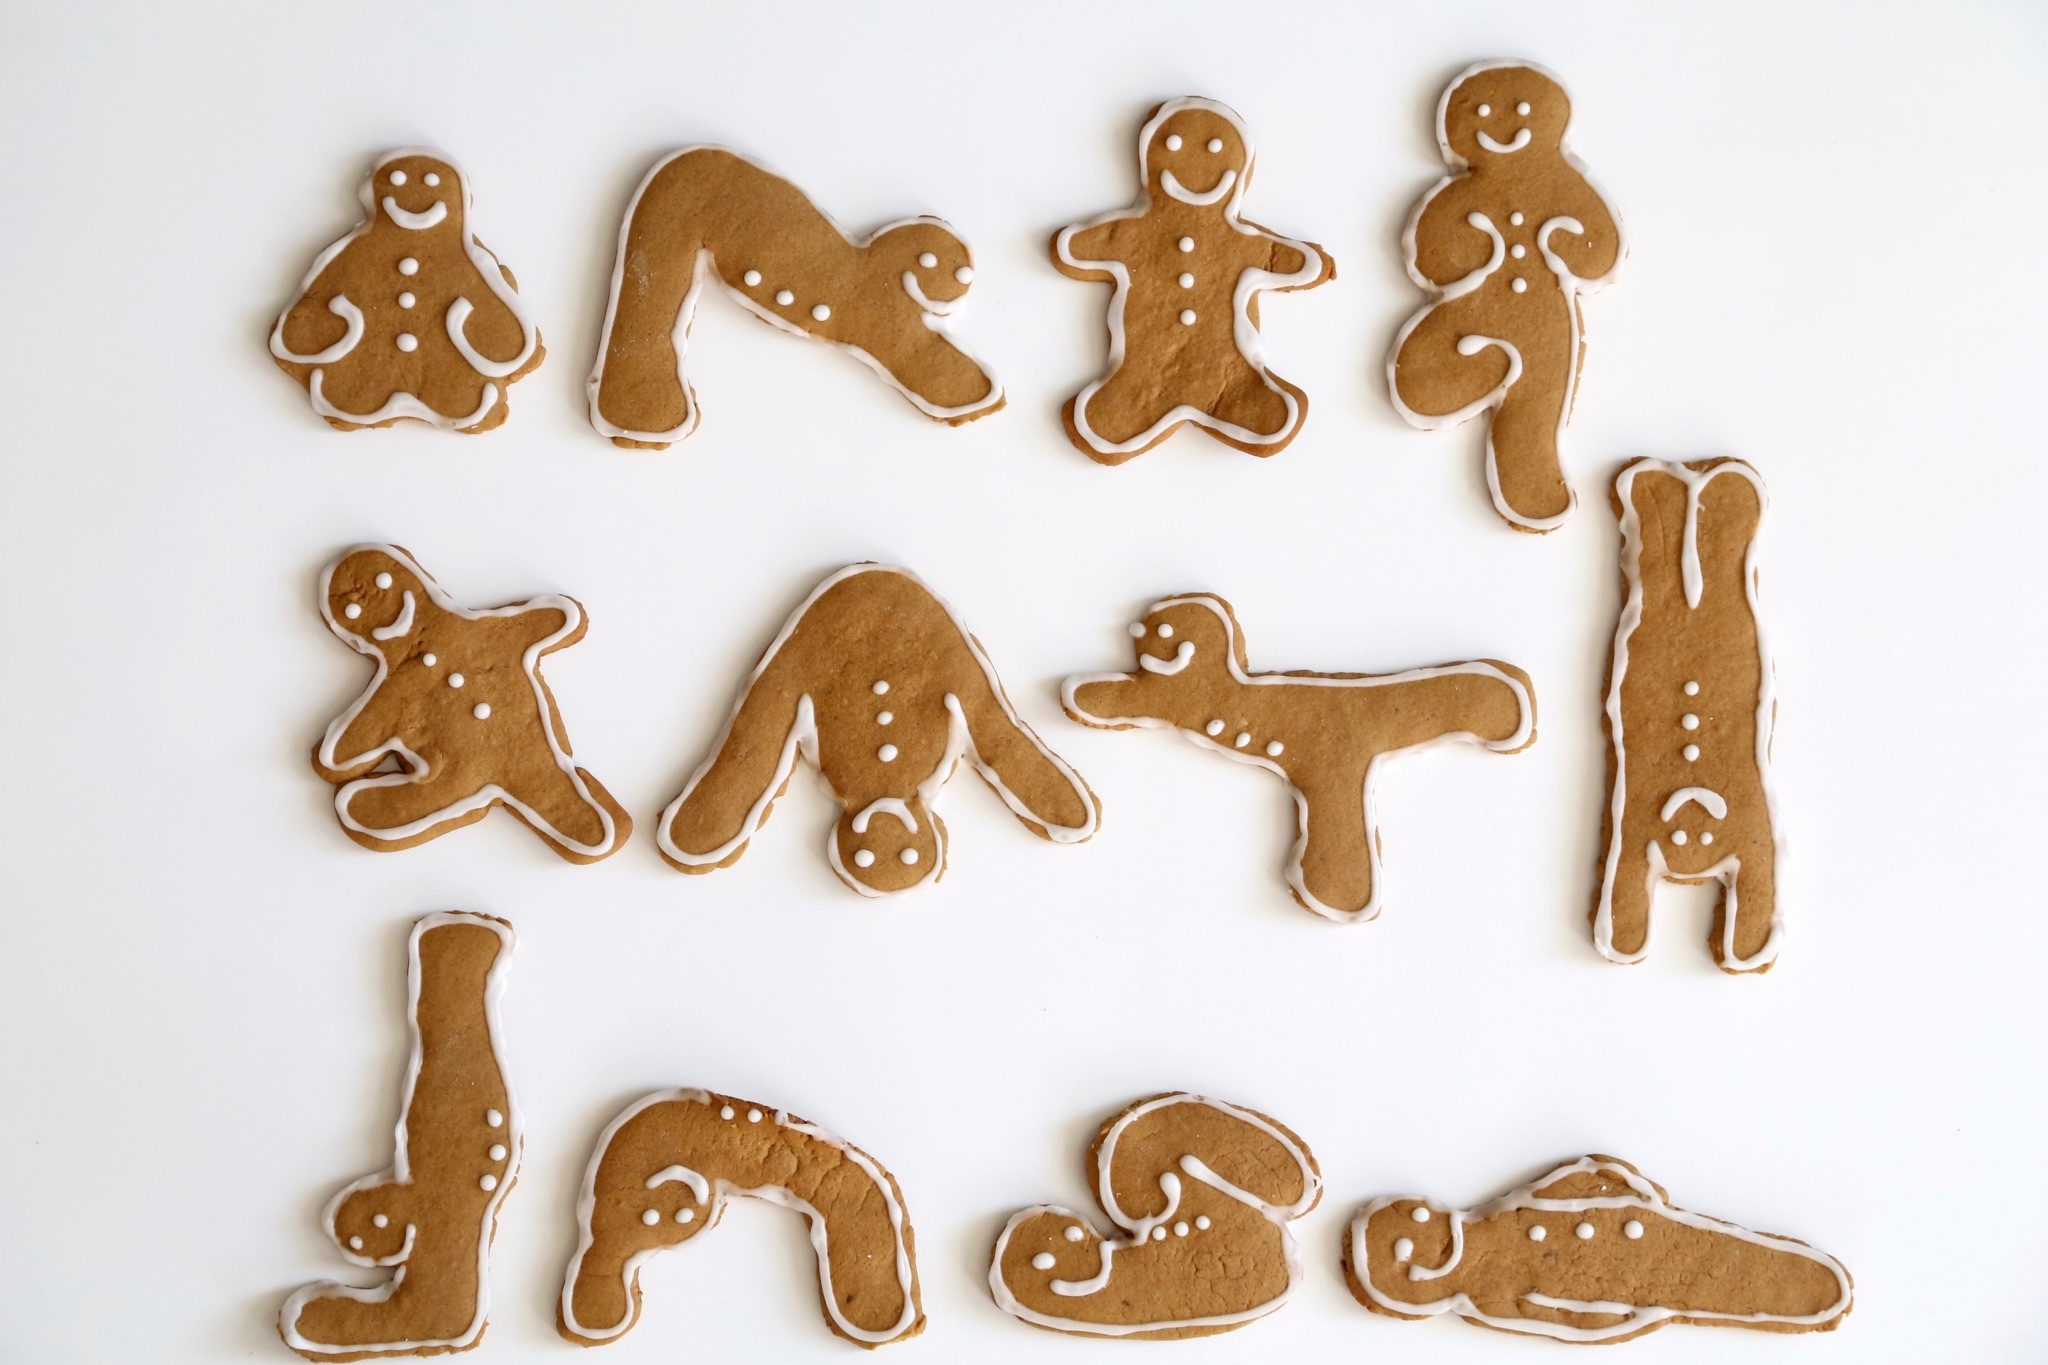
My gingerbread cookie sequence: Sukasana, Adho Mukha Svanasana, Tadasana, Vrksasana, Trikonasana, Prasarita Padottanasana, Virabhadrasana 3, Adho Mukha Vrksasana, Pincha Mayurasana, Urdhva Dhanurasana, *Apanasana, Savasana.
06 Dec 2015
Yoga Gingerbread Cookies
Believe it or not, sometimes after a long day of work all I want to do is come home and bake. Baking soothes me. I like knowing that if I follow the directions, I’ll create something delicious. And since I’m usually the one telling everyone what to do, it’s a nice change of pace to follow orders. There’s something deeply meditative about following a step-by-step process—if I can commit myself to the recipe, everything else just seems to fall away.
I came home from a full day of class and teacher training yesterday and decided to make yoga gingerbread cookies. I was actually inspired by a picture I saw on Pinterest of these gorgeous gingerbread cookies with beautiful, intricate icing, so I clicked the link (which I never do) and spent the whole day looking forward to making them!
I don’t own any yoga cookie cutters, so I went online and found some amazing designs by Patti Paige on her site Baked Ideas. I drew them free hand on a piece of paper and then cut out each shape and traced around it with a paring knife. You can order the cookie cutters on Baked Ideas by clicking here!
I’ve taken the liberty of converting and doubling the recipe for you, because you’ll need extra dough to make such big cookies!
Gingerbread Cookies
4 1/2 cups all purpose flour
3 tsp powdered ginger
1 1/2 tsp cinnamon
1/2 tsp nutmeg
1 tsp baking powder
1/2 tsp baking soda
1/2 tsp salt
1 cup dark brown sugar
14 T (1 3/4 sticks) of unsalted butter, softened
6 T unsulfured molasses
2 eggs
Sift all of the dry ingredients together (flour, spices, baking powder, baking soda and salt) and set aside.
Mix the butter and sugar on medium speed for 3 minutes. Add the molasses and mix for another minute. Add the eggs and mix until well incorporated.
With the mixer on low, slowly add the dry ingredients.
The easiest way to remove the dough from your mixing bowl is to put a little flour on your hands so the dough won’t stick to you. Divide the dough into 4 portions; mold them into a circle and then flatten them with the palm of your hand to form a disc. Wrap each disc in plastic and stick them in the fridge to chill for approximately two hours, depending on how patient you are. You want the dough to be cold enough to work so it doesn’t stick to everything, but malleable enough to roll out.
You could practice your sequence of gingerbread poses while you wait for the dough to chill.
When you can’t contain your excitement any longer, remove the dough from the fridge one disc at a time. Lightly flour your rolling pin and your work surface and roll out the dough until it’s about 1/8 inch thick. Either using cookie cutters or a pairing knife, cut out your cookies and place them on a cookie sheet lined with parchment paper. Place your finished shapes in the fridge to chill for another 20 minutes or so. Repeat this process with the remaining three discs of dough until all of your yogis are in the fridge awaiting their fate.
Meanwhile, preheat your oven to 350 degrees and practice a restorative pose of your choice.
After the cookies have chilled, pop them into your oven for 15 minutes, or until the edges start to brown ever so slightly. Let them cool on the baking sheet for 10 minutes, or until hard enough to carefully transfer onto a wire rack. Allow the cookies to cool completely before attempting to decorate them with icing!
Icing
1 cup of confectioner’s sugar
2 T fresh lemon juice (approximately one lemon)
Whisk until well combined. Pour the icing into a ziplock bag. Using kitchen scissors, cut off one of the corners to make your very own homemade pastry bag! Obviously the bigger the cut, the thicker the piping will be on your cookies.
Now for the fun part! Go crazy! You can use the photo above as inspiration, or give your gingerbread yogis a personality all their own. Be sure their jaws are relaxed and their eyes are soft.
Let the icing dry completely. Carefully stack your yogis in an airtight container; they’re flexible, so they can handle it. This recipe makes approximately 18-24 cookies, depending on how big your cookies are, and how well you resuscitate your scraps of dough.
These would make such a fun, thoughtful gift. They’re really tasty, so you might just decide to keep them for yourself; you could arrange them on a platter and create your own home practice sequence, and then eat them after Savasana. Enjoy!
*Backbends require transitional poses to neutralize the spine before moving into forward bends such as Apanasana. Postures like Supported Bridge on the lowest height of a block, Constructive Rest, Supta Padangusthasana, and ultimately a spinal twist would all be excellent choices before moving into spinal flexion, but I had a really hard time cutting out these shapes so I had to leave them out of my sequence! I also would’ve liked to include Virabhadrasana 1 to open the hip flexors in preparation for Urdhva Dhanurasana, but alas, that didn’t happen.

[…] These cookies put the OM in nom nom nom! Get the recipe here. […]