Homemade pasta is a courageous practice. You just have to jump off the cliff and trust that a big bowl of tagliatelle, or spaghetti, will appear to catch you. Pasta dough is simple to make, but lest we forget: just because something is simple doesn’t mean it’s easy. You will make mistakes. The first time I made homemade pasta was a complete disaster. I used way too much flour and then rolled it out with a rolling pin, not nearly thin enough. It looked like a paper mâché project gone awry, but I ate it anyway (of course), which rendered me comatose. I had to lie down for the rest of the day.
26 Apr 2017
Homemade Mushroom Ricotta Ravioli
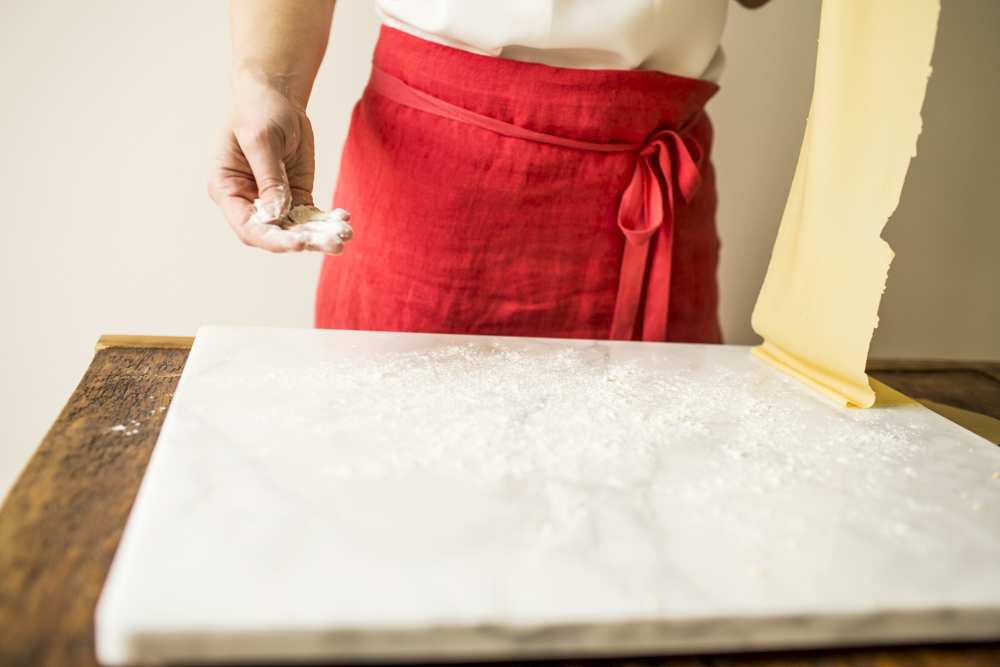
Marble pastry board, Sur La Table
Undeterred by my failure (and motivated by pasta) I just kept trying. I made a lot of dough. Like, a lot. I’ve been mostly guided mostly by my failures. One time I kneaded a dough for so long that I had to modify my yoga practice and explain to my teacher that my sore wrists were because of a pasta injury. While my initial efforts in this department were one hundred percent driven by the finished product, the more I practiced, the more I fell in love with the process.
I’d like to state for the record that I am by no means a pasta expert. I am, however, a pasta lover, which should count for something! I’ve learned a lot along the way, especially about the dough—the consistency, the way the dough comes together in my hands. It just takes practice. To save time, I make it in my KitchenAid food processor. And I bought the pasta attachment for my KitchenAid mixer, which was a game changer!
I’m so excited to share this recipe with you! Make sure you read through the whole thing a few times before you dive in. Clear your schedule and enjoy this Italian meditation!
Homemade Mushroom Ravioli
Serving size depends on how big you want to make your ravioli, but regardless, this recipe makes a lot of pasta. Plan on serving half and freezing half.
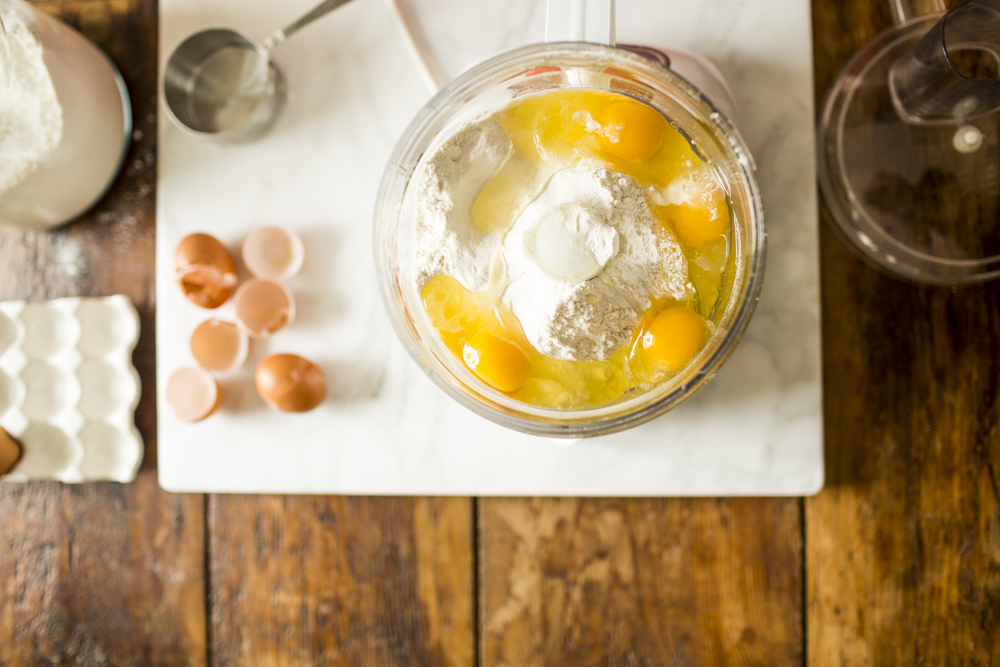
Pasta Dough
4 eggs
2 1/2 cups all-purpose flour
salt
Using a food processor, pulse the eggs, flour, and healthy pinch of salt until the dough comes together into large crumbs. Don’t over pulse.
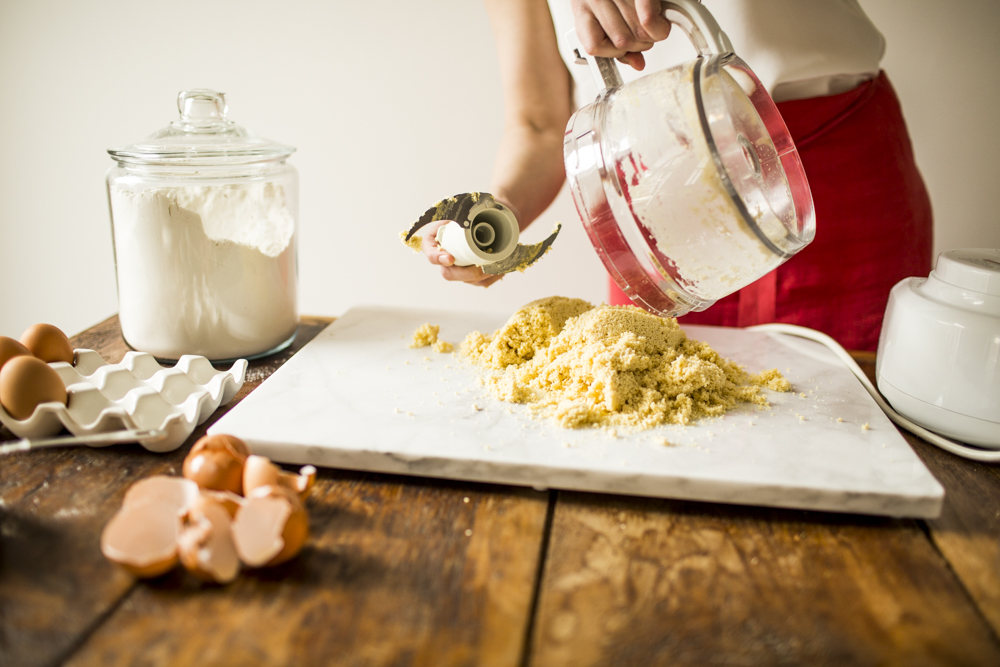
Food processor, KitchenAid
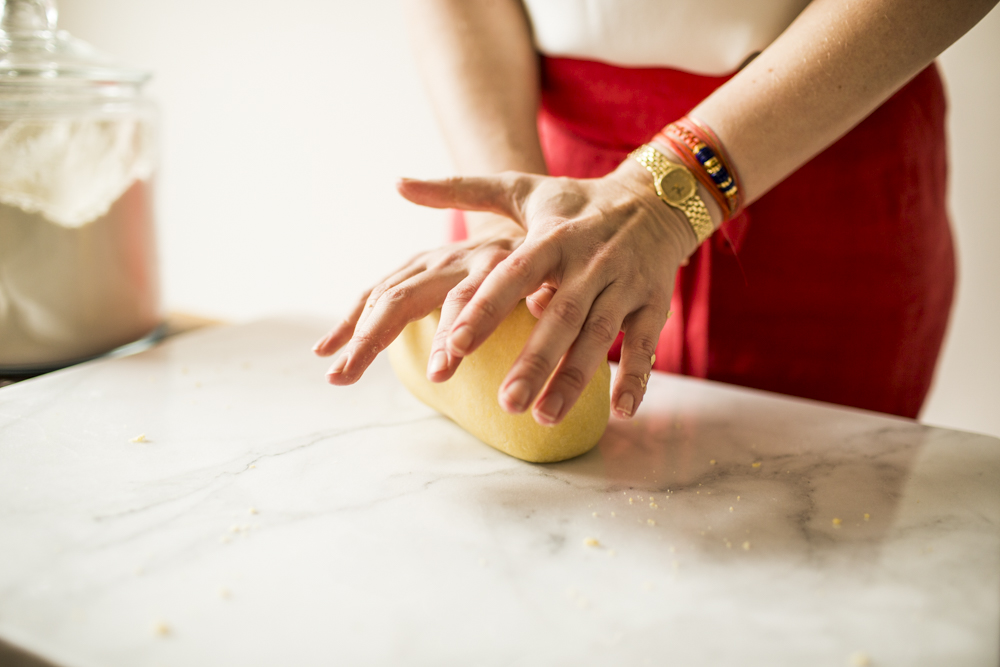
Turn the dough out onto a clean, smooth surface. Press it together with your hands until it forms a ball, then roll up your sleeves and start kneading! Knead for 10 minutes. Use the heel of your hands to press the dough away from you, and then pull the back over the front and repeat (again and again and again). It’s a meditation. Tether your mind to the fluid motion of your hands. Find a rhythm. Focus on the texture of the dough under your hands. When the dough is smooth like a baby’s bottom, you’re good to go. Wrap in plastic and let rest in the fridge for 30 minutes.
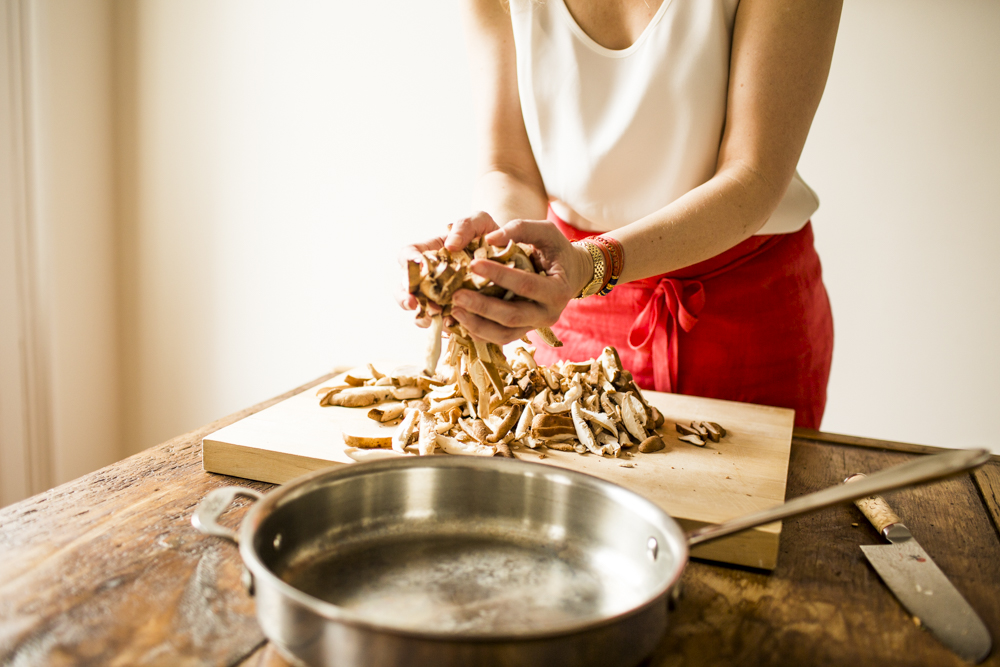
Filling
2 shallots, finely chopped
1/2 pound shiitake mushrooms, stems removed
1 tablespoon unsalted butter
1 tablespoon olive oil
2 cups ricotta cheese
1/4 cup chopped parsley
one egg, whisked (for the egg wash, or the glue that holds the ravioli together)
salt + pepper to taste
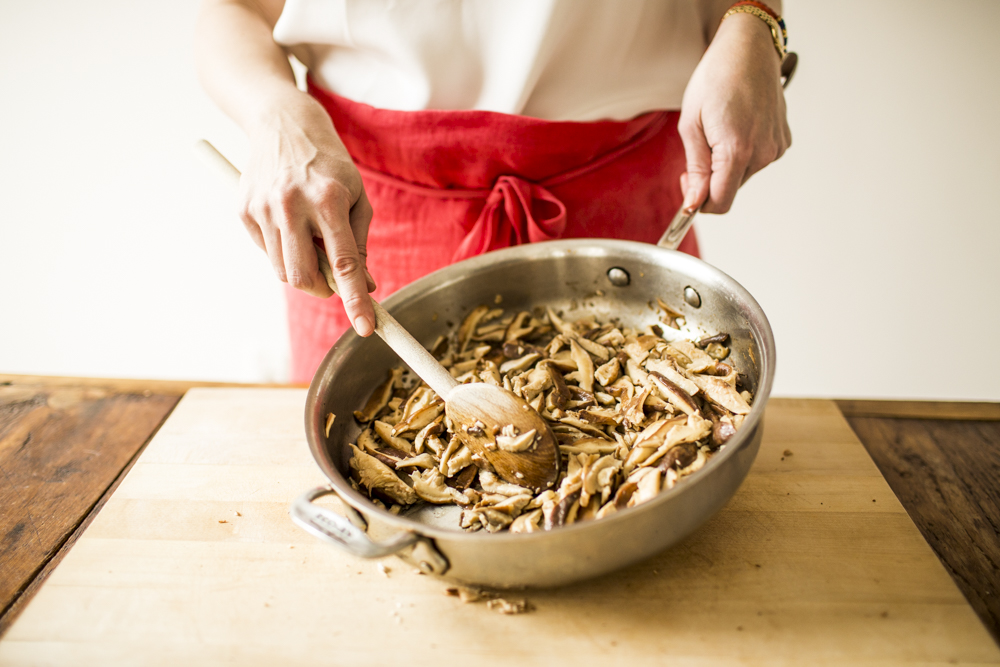
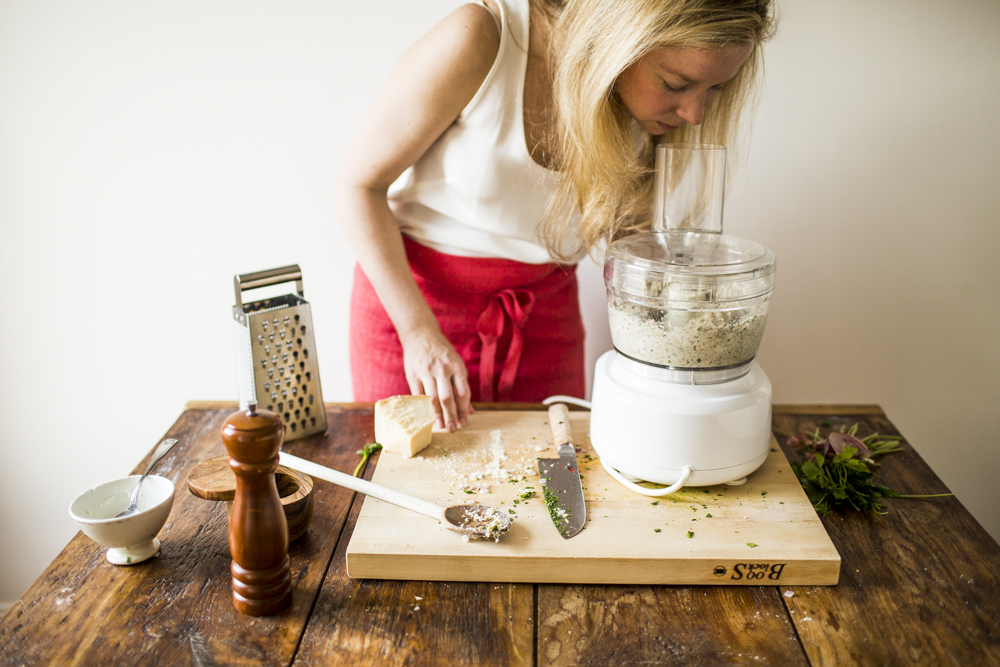
Sauté the shallots in the butter and olive oil until translucent, about 2 minutes. Add the mushrooms and sauté until soft and browned. Combine the mushroom mixture, ricotta, parsley leaves and salt + pepper in a food processor. Blend until smooth. Taste and adjust seasoning as needed.
To Roll Out the Pasta
Using a dough cutter, slice the dough into eighths. Working one eighth at a time (keep the rest of the dough wrapped in plastic in the fridge), flatten slightly with your hands. Set your pasta attachment to 1 and turn on your mixer. Lightly flour (don’t overdo the flour!) the dough and run it through the pasta roller. Then, fold the dough in half and run it through again. Repeat this four to five times. This gives the pasta that bite. Set your pasta attachment on 2 and begin the process again, repeating two or three times. Once you move onto the third setting, you don’t need to continue folding the dough in half every time you run it through. Continue tightening your pasta attachment setting until you can see a faint outline of your hand through the dough. You’ll end up with a long sheet. You want it to be tough enough to stand up in the water, but then enough to taste light.

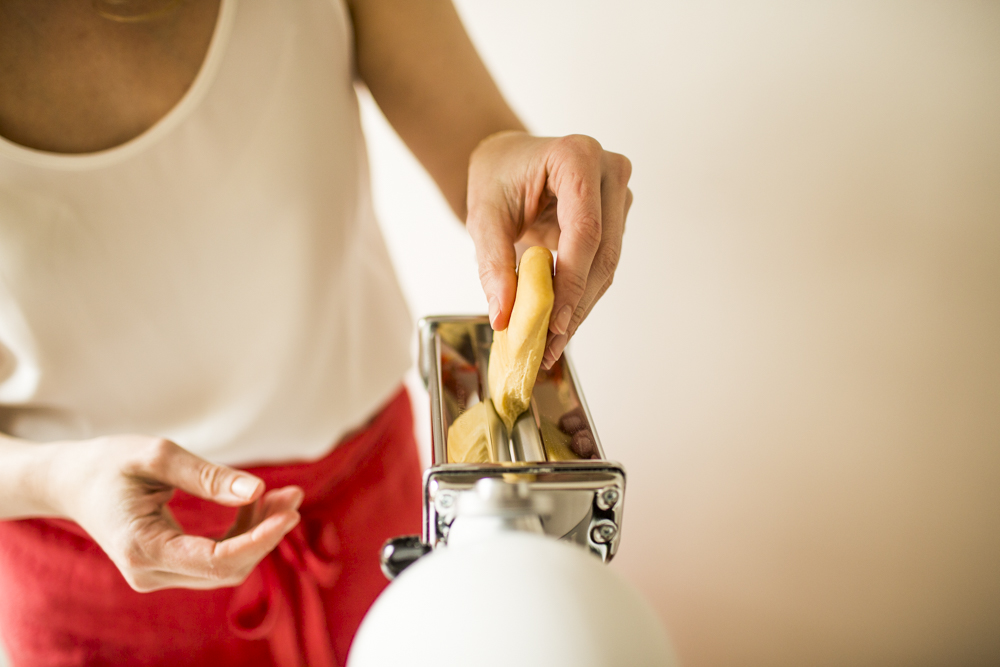
Pasta roller attachment, KitchenAid
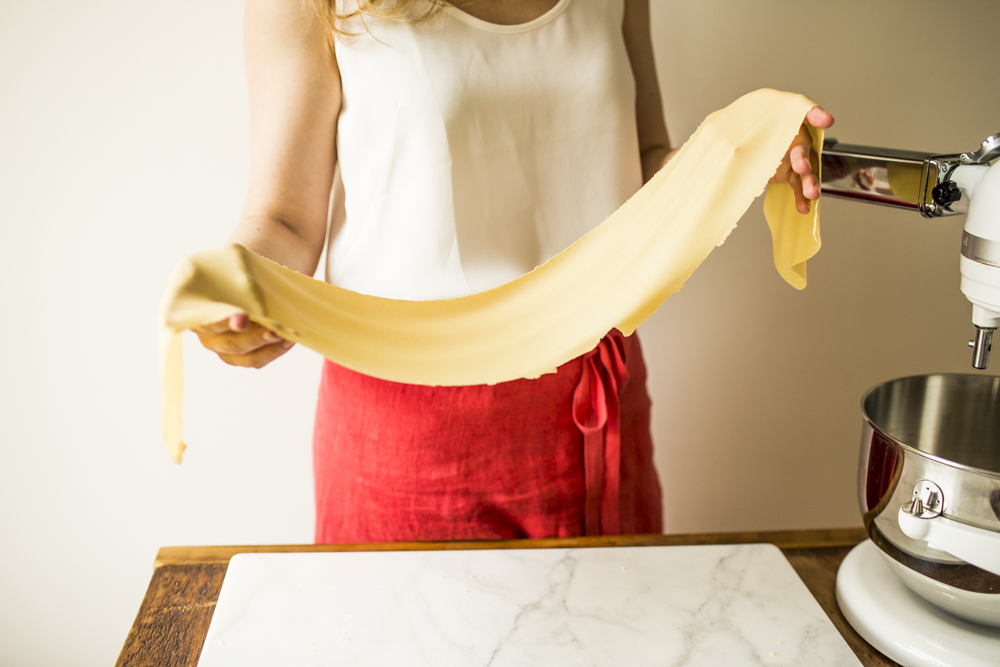
Stand mixer, KitchenAid
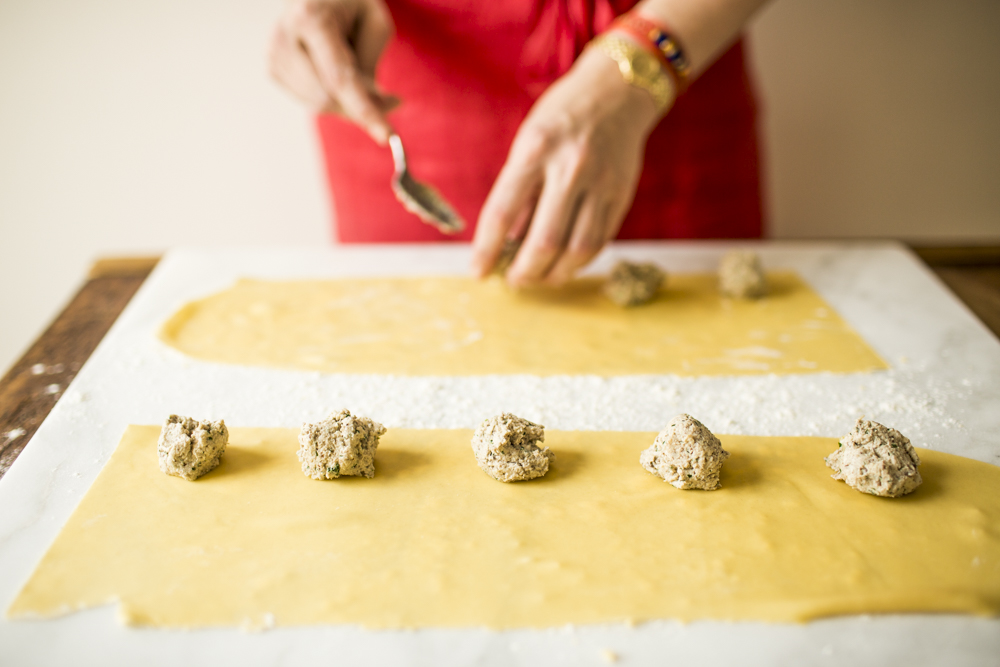
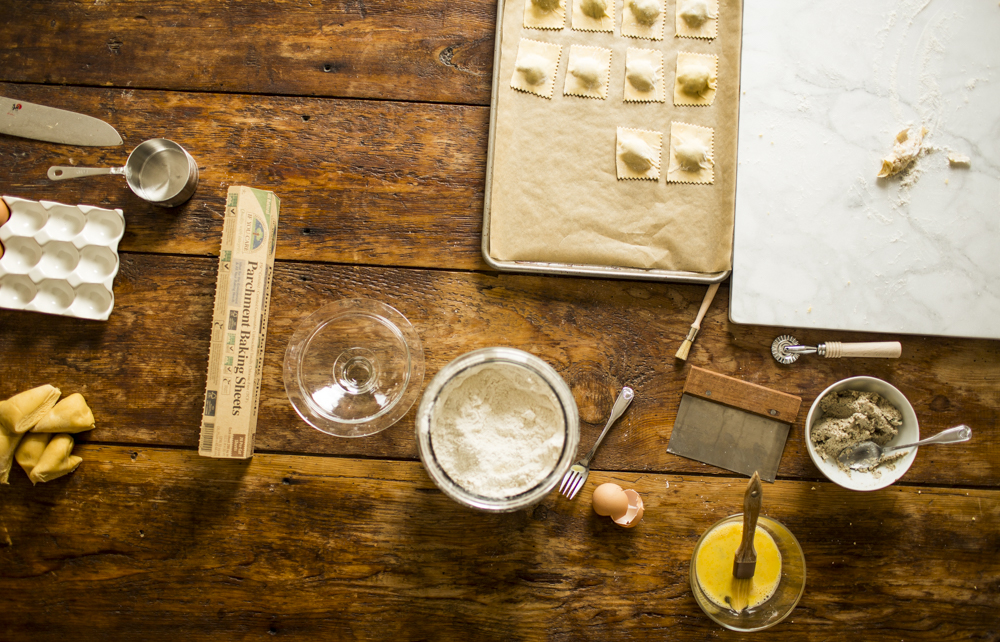
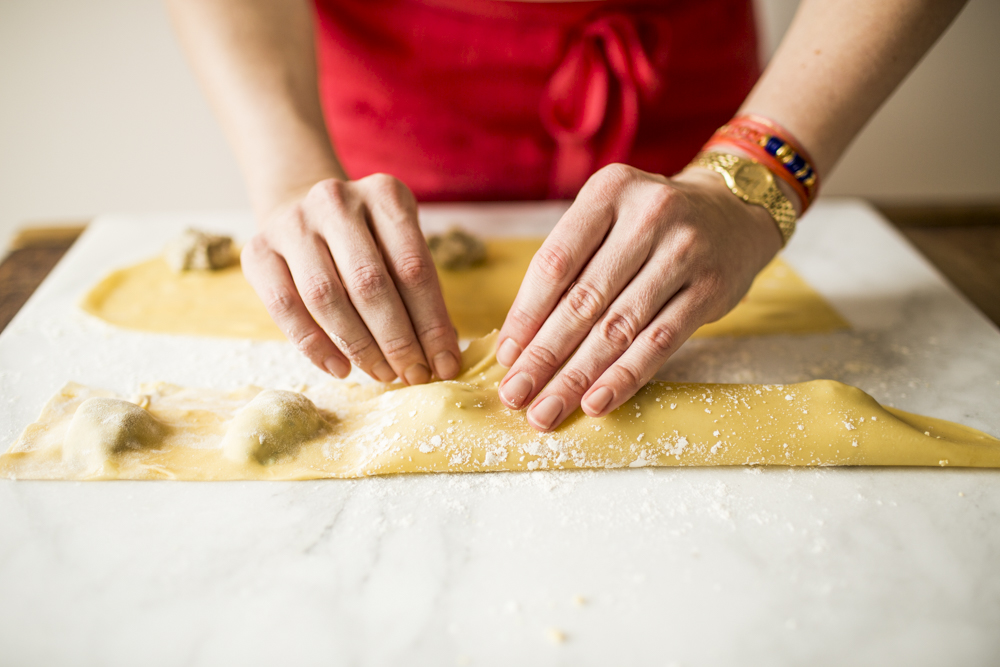
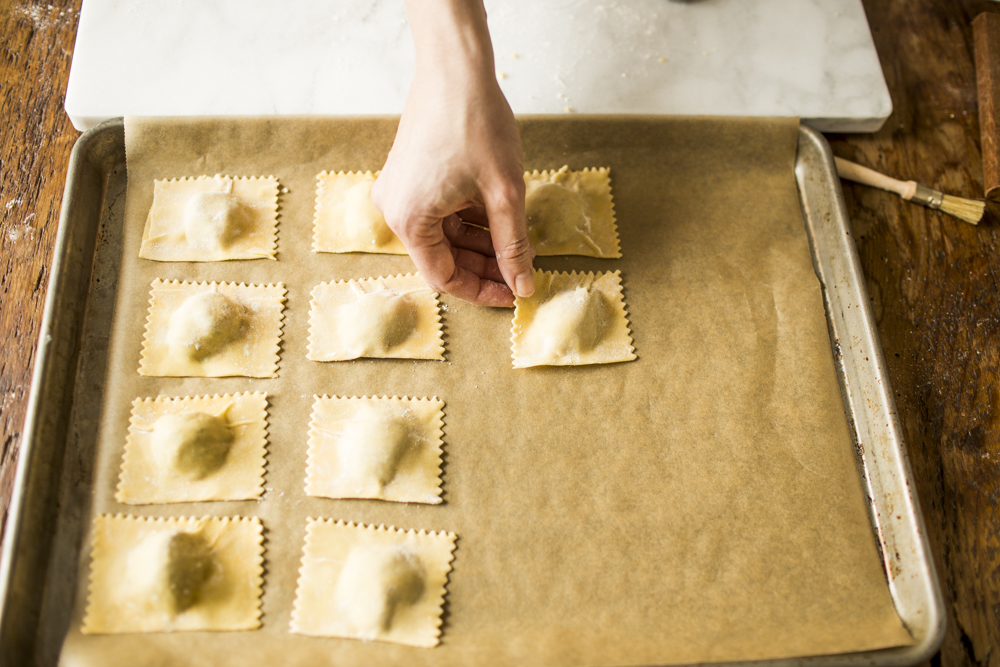
To Assemble the Ravioli
Set up baking sheets lined with parchment paper. Prepare your egg wash (one egg whisked with a splash of milk). Have flour on hand to flour the dough and your work surface. You’ll need a couple of clean, dry dish towels to cover your pasta while you work.
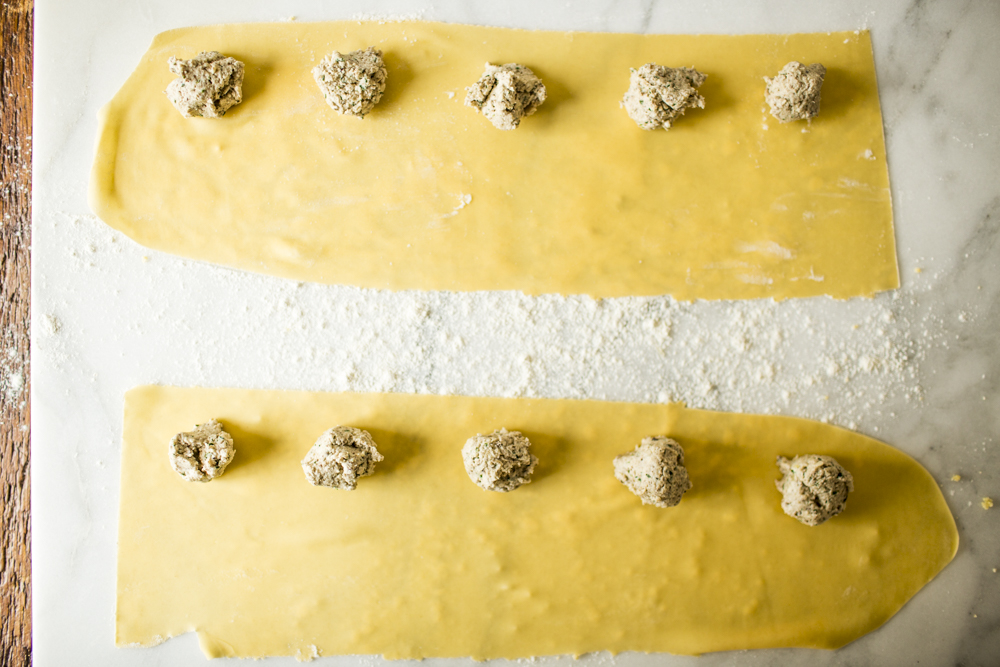
You have two choices on how to assemble your ravioli. If you want to make larger ravioli, you’ll use two long sheets of pasta dough. Place one strip on a floured working surface and cover with a clean dish towel while you get working on rolling out the second sheet. When both strips of pasta are ready to go, spoon out your filling onto the bottom sheet and then cover with the top.
Or, and this is what I do, use one sheet of pasta to make the ravioli, simply folding it over itself.
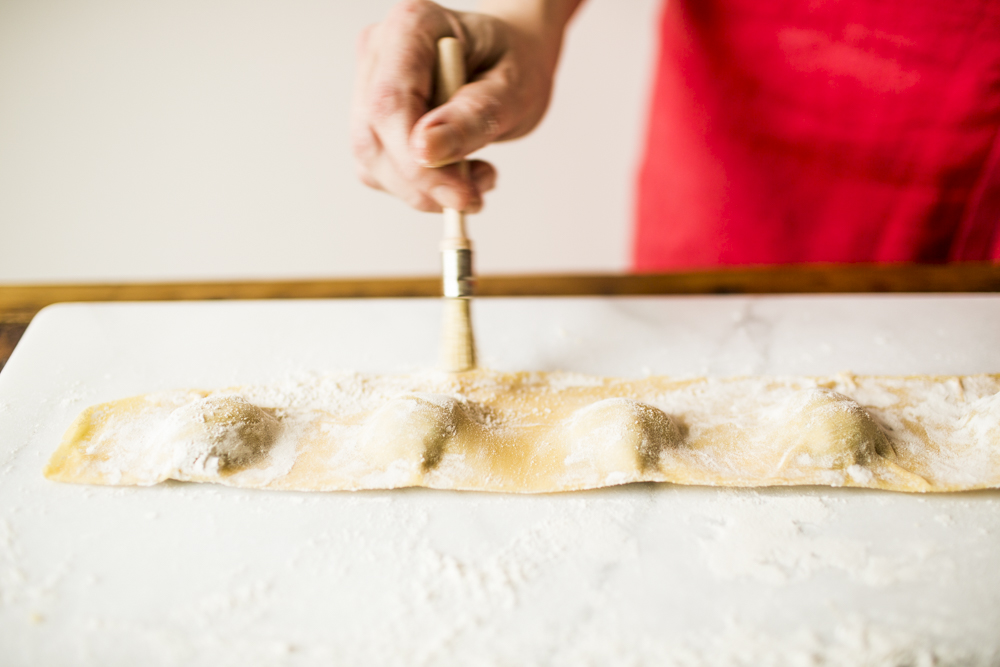
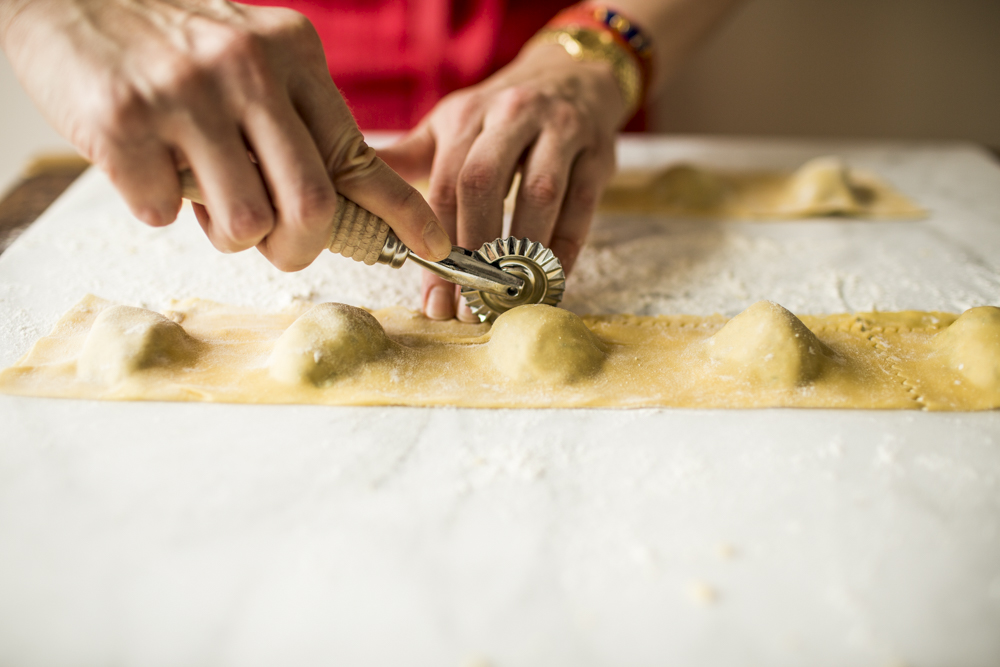
Use your finger or a brush to paint the egg wash around the edges of the filling; this will glue the sheets together and close the seams. Working from one side to the other, carefully use your fingers to press the seams together. With a dry brush, dust off any excess flour. Use a pasta cutter to cut out your ravioli. Transfer the finished product onto the baking sheet. Cover the baking sheet(s) with a clean dish towel to prevent the pasta from drying out while you work.
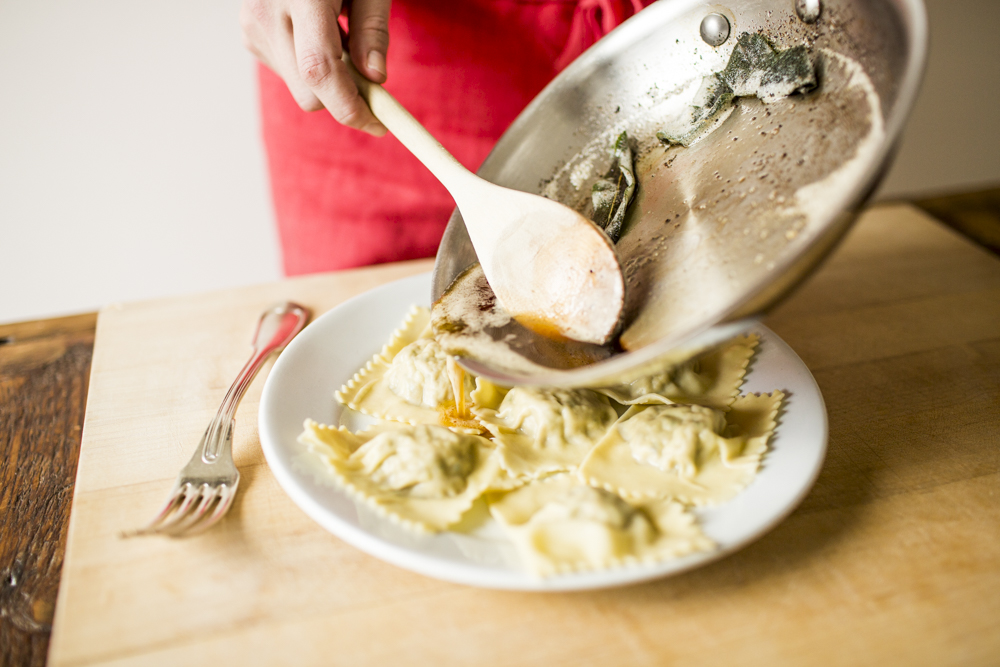
Wrap the baking sheets with plastic and chill in the fridge until you’re ready to serve. They cook fast, about 2 minutes. Remove the ravioli from the pot with a large slotted spoon.
To Freeze Your Leftovers
For the pasta you want to freeze, lay the ravioli in a single layer on a baking sheet and wrap the baking sheet(s) with plastic. When the ravioli are frozen through, transfer them to a ziplock bag. This prevents the ravioli from freezing together in a big chunk! I love having homemade ravioli in the freezer because it means I can whip up a quick, delicious dinner in minutes. Billy and I will often skip the brown butter sage sauce and simply add a little bit of truffle butter over our pasta. So good!
Brown Butter Sage Sauce
half a stick of unsalted butter
three to four fresh sage leaves
salt + pepper to taste
The sauce couldn’t be easier to make! Simply melt the butter and sage in a sauce pan over medium-high heat (swirling the pan occasionally) for a few minutes or until the butter turns brown. Your home will smell like heaven!
In yoga, we talk a lot about letting go of the goal and focusing instead on the process, but I think it’s important to remember that goals can be what motivates us to show up for the practice. Goals are not the issue; identifying with the goals—thinking that your wholeness somehow depends on the result—is where we can get ourselves into trouble. You are not defined by your success, just as you’re not defined by your failures. In fact, I think that our failures are, in many ways, more valuable than our triumphs. Simply put: I wouldn’t be sharing this recipe with you if I hadn’t failed (many, many times). It’s my biggest flops in the kitchen that have taught me the most about the process.
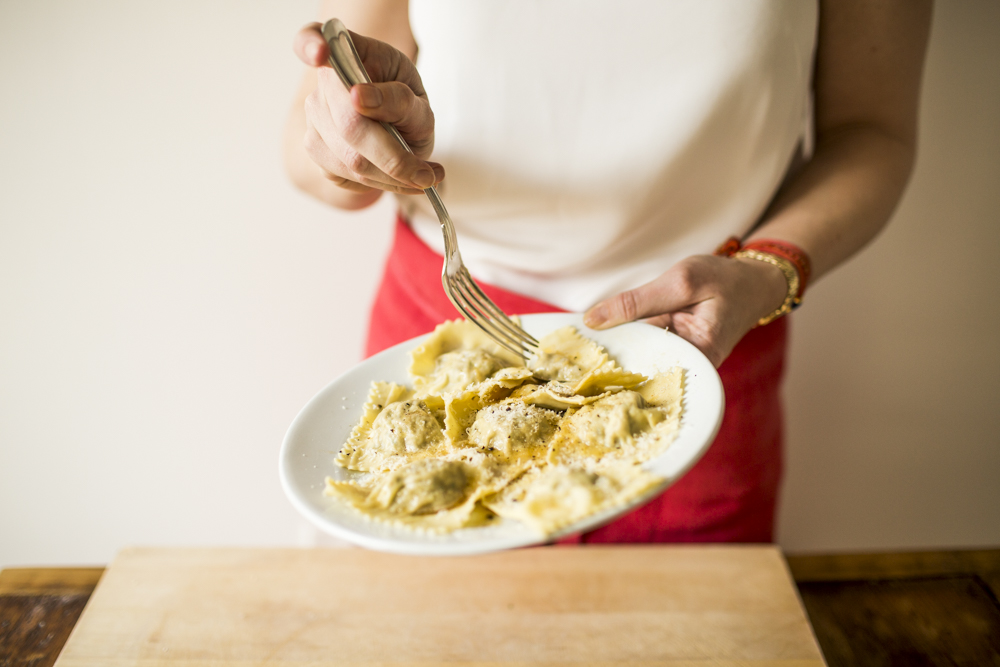
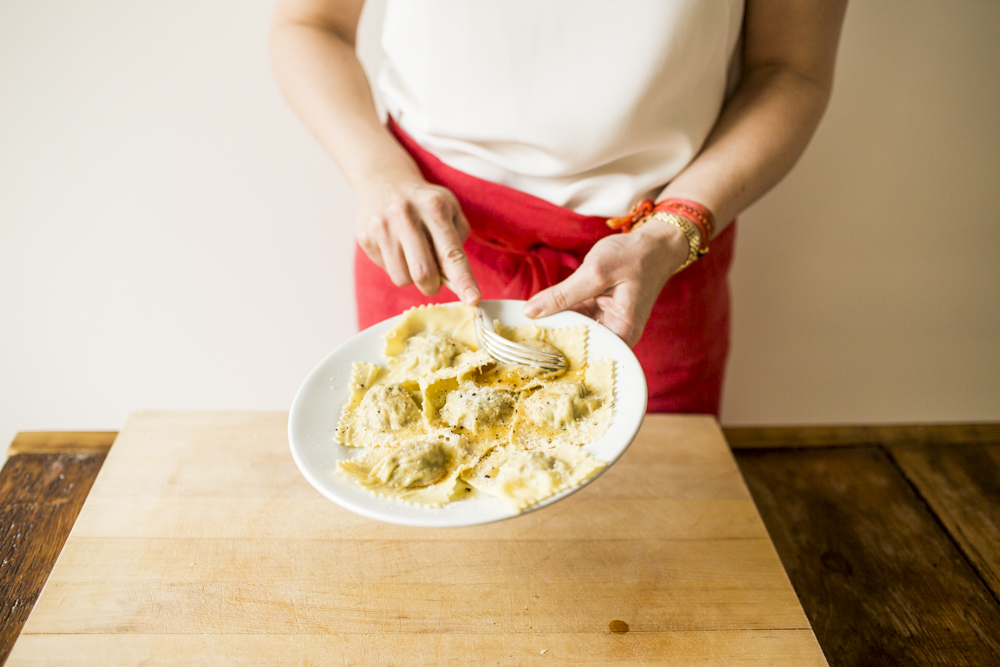
I hope this recipe inspires you to just go for it! Dive in (to that plate of homemade ravioli)! I promise you, it’s worth the effort.
Photo credit: Christopher Golden

You May Also Like
Read Winter 2023

09 Feb 2023
Winter 2023
It’s been a while since I’ve created a mood board. Going in, I wasn’t sure if I would remember how to make one or if there was even a point in making one at all. As soon as I started pulling images, my doubt fell away and I quickly remembered why I love making mood boards—they help me see how I feel. As a visual person, a mood board gives me a direct line to my experience.
Read Assumptions

25 Apr 2019
Assumptions
I think one of the biggest challenges of teaching yoga is the tendency to make assumptions. The truth is: It’s hard to read a room without reading into it. It’s hard not to label what we see and feel. It’s hard to hold space without getting in the way. It’s ALL hard. Teaching is HARD.
Read Align With Your Why

12 May 2017
Align With Your Why
When we think about what we really want, we don’t always consider what we’re willing to endure to make it happen. In fact, the seemingly insurmountable challenges that inevitably arise along the way force us to prove our commitment to the path. Life likes to test our resolve. If the why behind our efforts is not compelling enough, we might not find the strength to see it through.
Join the Discussion